I promised myself I've to at least get the mill trammed this Saturday. Got up real early today knowing that I would spend at least 2 hours reading and replying to mails, watch those YouTube videos on machining, and do the usual business one does in the morning.
An hour or so was spent tweaking the column with aluminum shims and dial test indicator to get to a level of accuracy I am after (I'm more realistic now...).
I'll go into a little bit more as the pics are presented.
First order of the day is to reduce the play between the Z axis saddle and the column dovetails. A new piece of A2Z super gib was used. Play was considerably reduced, at least visually. The knocking sound I once experienced when I brought the column back from Mike was gone.
Marking out the excess to be trimmed. I wanted to leave more behind but it will hit the motor mount at the top of the column.
Same done on the other size. The gib is inserted from this side. A little tricky for my clumsy fingers...
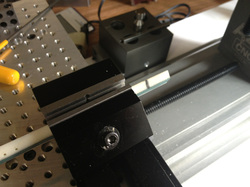
Since the Sherline vise was already mounted, I use it to hold the gib and saw off the excess with a hacksaw.
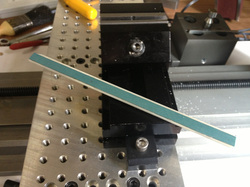
After touching up the sawn ends lightly with a file. Some way oil was applyed to the blue strip before installing.
Tramming the column started right after. I clamped down my largest square on the table with the Sherline step clamp and ran the DTI up and down its blade.
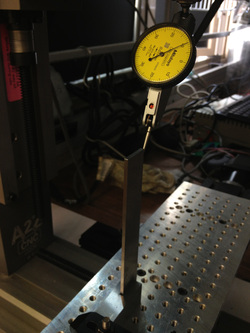
I started off with 0.2mm of misalignment along 120mm of travel. After putting in the first piece of shim I was done to about 0.1mm.
This is the best I could manage - 0.02mm. Good enough for me at this moment.
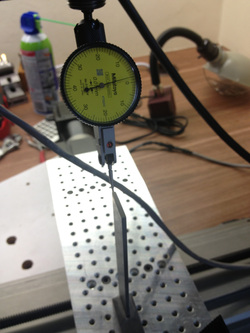
Turning the square over by 90-degree and indicate front and back tilt. I'm off by about 0.17mm.
This is much much better. The shim was placed at the back of the column. From this pic, you can see the shim (in red) on the right side of the column from the previous step.

The aluminium shim bought locally. You wouldn't believe how much I paid for these. bought them 2 years ago after searching online from a company base in Simei.

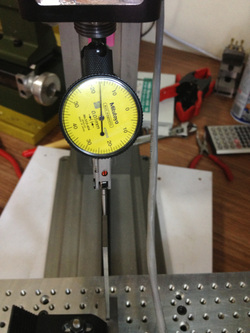
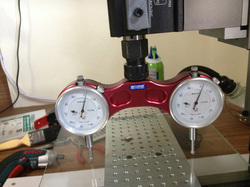
Using Terence's Traminator to tram the tilt of the spindle. Since everything (or almost) are aluminium, I use the 10-20-40 block bought from Arc Euro Trade to set the indicators.
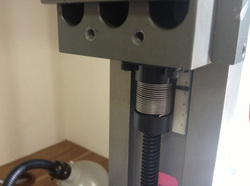
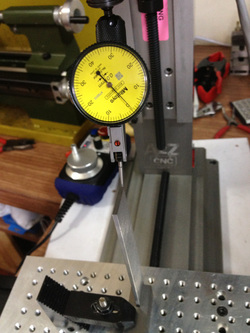
The tramming of this part was done using the 2 set screws holding the A2Z spacer block. Clever idea from the folks at A2Z.
The tramming of this part was done using the 2 set screws holding the A2Z spacer block. Clever idea from the folks at A2Z.
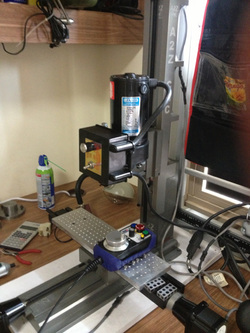
The table is a little too small to check the front/back tilt. So the glass plate was drafted into service.
The bottom of the spacer was shimmed to level the 2 indicators' reading. A little more tricky than the column.
The bottom of the spacer was shimmed to level the 2 indicators' reading. A little more tricky than the column.
All done and ready for action. Time for photoshot.
The Pendant from VistaCNC is really fun to use. There are more function available than I need. Good to have around the mill.
The Pendant from VistaCNC is really fun to use. There are more function available than I need. Good to have around the mill.
I'm now all set for action. First order of the day would be to make a Lithophane of my elder girl when she was 7 years of age. Really cute. Will post about that when I get to it. Hope that it wouldn't be another long time before my next post.
Blessing to all!
Blessing to all!
 RSS Feed
