Wongster's Production
Share it on
  • Home
  • Blog
  • My Old Blog
  • My Shop
  • Resources
  • About Me...
  • Contact Wongster

Spindle Speed Test

15/8/2015

0 Comments


No pic for this post. Just to dicument what I tested like night, before turning in.

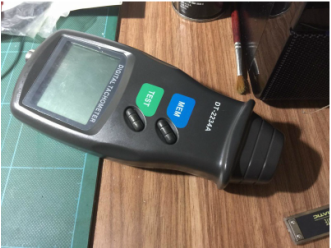
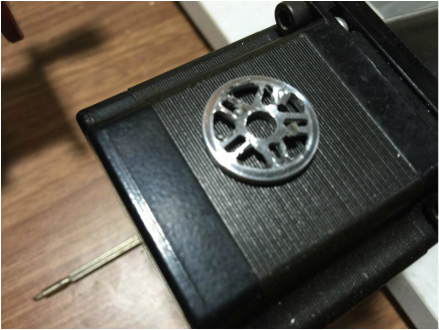
I stripped the handheld contactless tachometer to see if any solder joint came loose. The tachometer decided to start working again after I put the board back to its case.

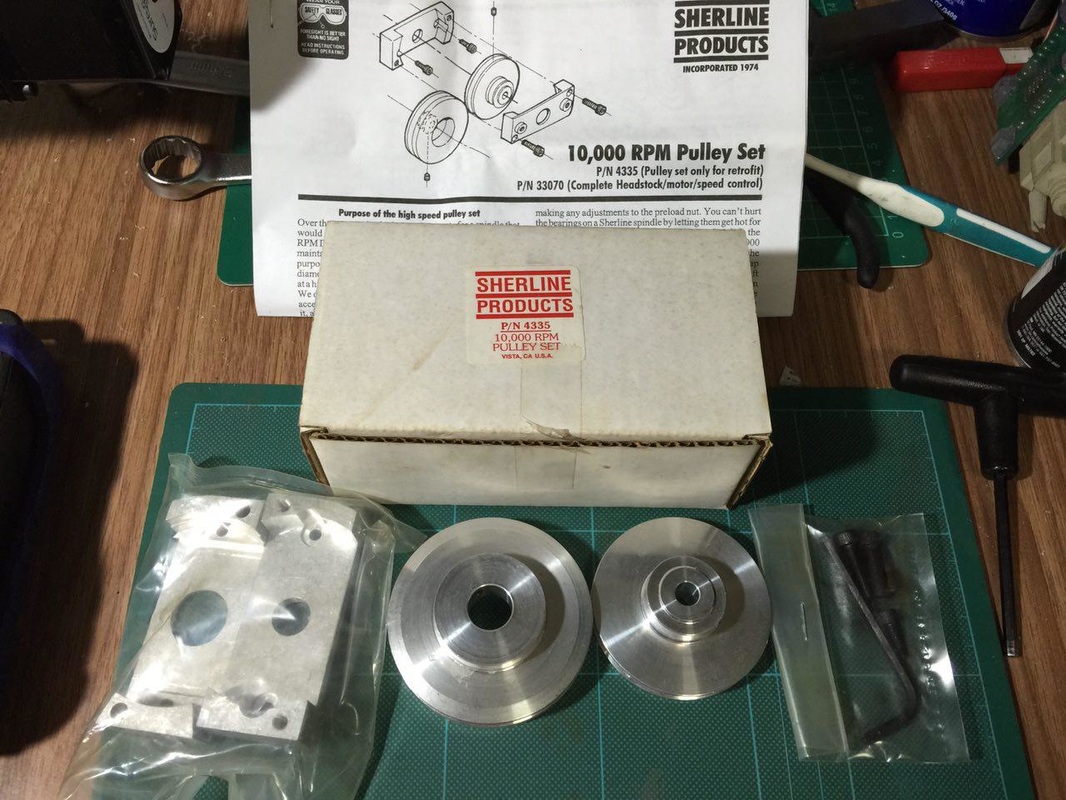
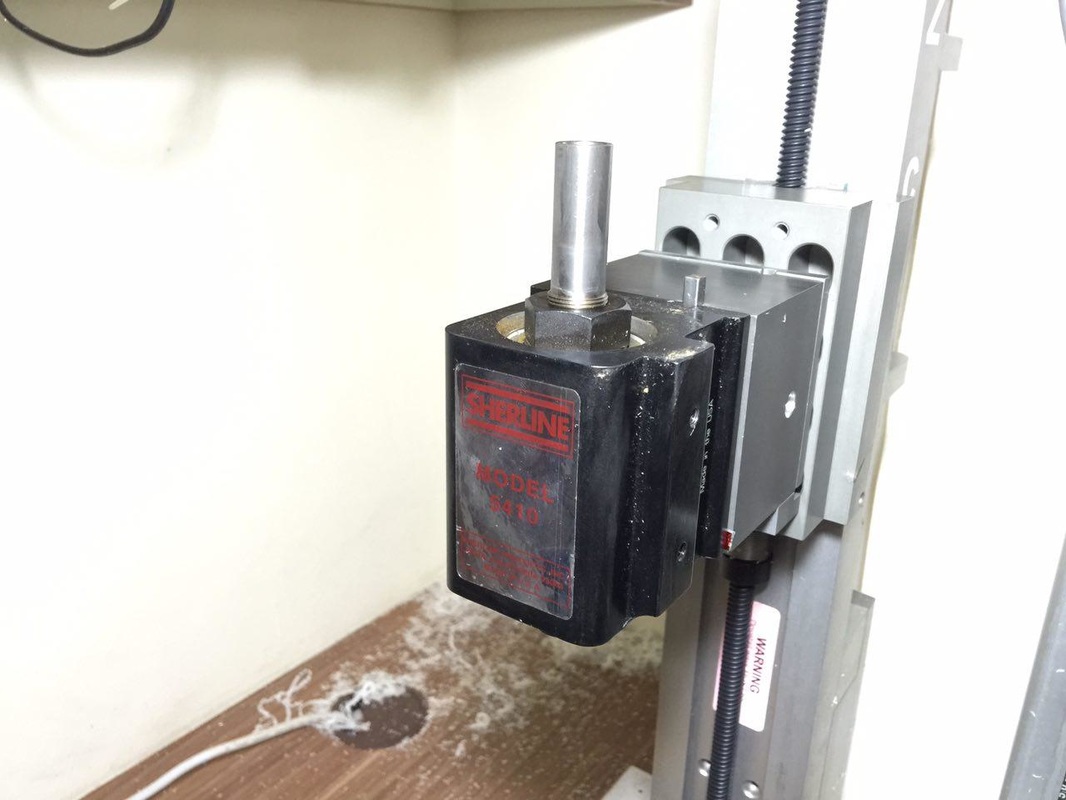
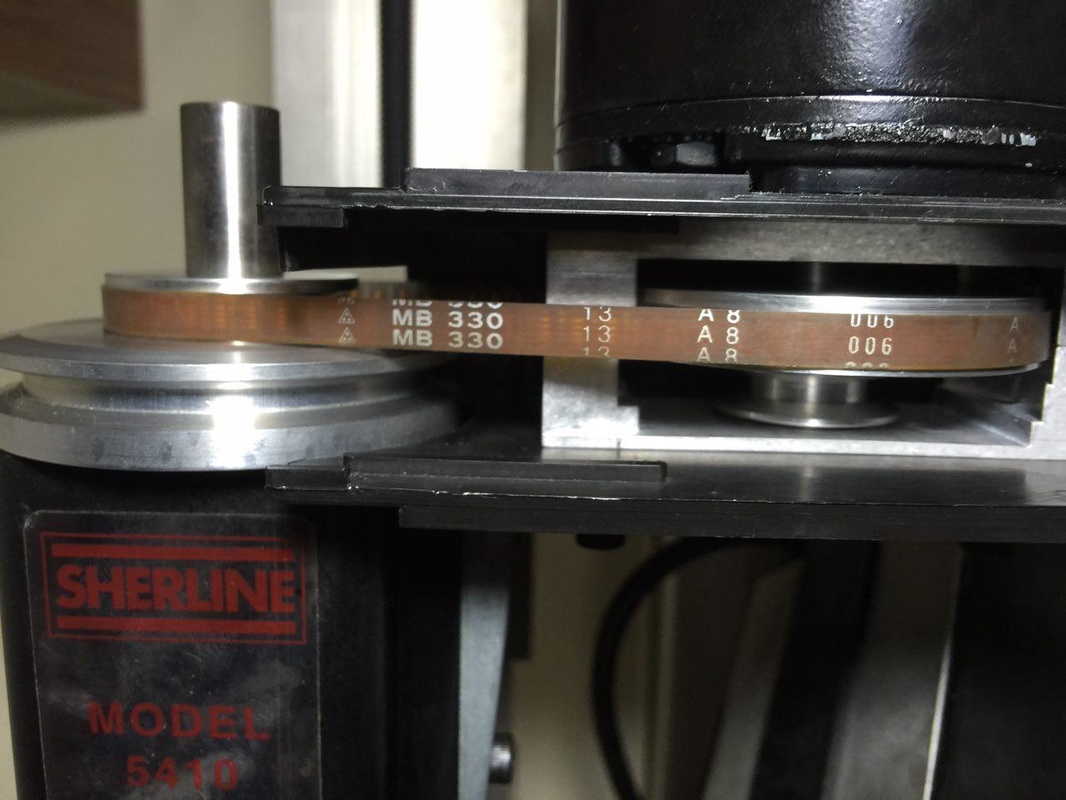
To start my test, a small piece of black stick was pasted onto the larger spindle pulley. With the trimpot turned to max, the readout showed a number above 10,000 rpm. As the display was jumping around quite a bit, I don't know how much above 10,000 rpm it really was running at. If you remember from my previous post on installing the pulley, I didn't adjust the preload of the spindle.

Maybe it's time for me to make a lithopane of my family with the higher speed spindle pulley installed.

0 Comments

The 3 Tamiya 4WD Designs Completed!

12/8/2015

2 Comments

 
After fooling around for a couple of weeks, I've finally completed the 3 rollers... Learnt quite a bit along the way on cutting such small wheels.  Bulk of the time were spent on the notebook working on the CAD drawings and setting up the roller blank.  My breakthrough came when the Thai hobbyist (Instagram handle max_pannara) replied with his method of holding down the rollers.  But, unlike him, I'm unable to remove the completed rollers by plying them off with a flat head screw driver.  I did manage to work around the problem by drill through holes in the recess holding each rollers and tap them out from the back.  This is not very efficient as I'll have to indicate the plate in again after each batch.  Since I'm will not be making many, I'll live with the trouble.
Picture
A note on the 10k RPM Pully upgrade from Sherline.  I didn't adjust the preload in the spindle as mentioned in the instruction as it will introduce more play.  While doing the 3rd design (right most) which took the longest to machine, the spindle housing did get a little warm to the touch but not burning.  I'll monitor when I start cutting the batch of 10 after the design has been chosen by FJ, the person commissioning me the job.

Picture
The higher spindle speed did cut cleaner, leaving me with burr free finish.  Love the result.  Definitely a worthwhile investment.

This pic was taken just after the machining - very clean...
I'm looking to take videos of the machine in operation.  Saw from the iPhone App "Geek" that a GoPro look-alike is going for about SGD 50 to SGD60 excluding shipping.  Very tempted to get one to try but I've to control my spending.

Ok, that's all for the day.  Hope to update you folks soon on my activities in my home shop.

Be blessed!
2 Comments

Sherline 10K Pulley Upgrade

10/8/2015

0 Comments

 
Everyone has been telling me that to mill with tiny endmills, I need very high spindle speed.  The max speed of the default Sherline spindle is 2800 rpm, which mean that I've to go extremely slow (around 50mm/min) and very shallow (like 0.2mm in aluminium) if I'm to use a 1mm endmill.  The last roller I need was done at 100mm/min with DOC at 0.20mm per pass.  I was told that I'm risking the endmill.

I remembered buying the 10K pulley upgrade from Mike of SG Tooling several years ago and started digging through the boxes.  Found it still wrapped up in plastic in the box.  After reading through the installation guide many times, I proceeded to put it on the machine.
Picture
The pulley set, buried in the pile of stuff I buy through the years.
Picture
The old pulley taken off. I tried not to disturb the alignment of the spindle during the installation.
Picture
After carefully aligning the pulleys to make sure there are no rubbing.
Picture
Found this. Some kind of sensor I bought many years back. Still sealed in its bag. I forgotten who I bought it from and how to install it. It has a USB connector on one end of the cable. So I assume it should be directly connected to PC. I prefer it to go to my controller instead.
Picture
Stripping everything down.
Picture
Different type of stand off being used in this. The pulley is also bigger than the original.
Picture
Wanted to test the spindle speed after the installation but this junk refused to be switched on... This is my 2nd piece, both from China through eBay.
Its now 2.30am in the morning.  I think I better stop here and get some sleep.  I want to bring the girls out tomorrow to walk along the river near my place.

Let me leave you with this video of the spindle running up to its max speed, whatever it is, since I didn't adjust the spindle preload and have no way to test.  Click here to view on YouTube:  Sherline 10k RPM Pulley in operation

Have a blessed week folks!
0 Comments

Fixing the Fixture Plate and Machining Roller Type 3

10/8/2015

0 Comments

 
After the failure in removing the roller from the fixture, I wrote to the Thai gentleman again seeking his advice.  While waiting for his reply, I decided to drill through each recess with a smaller diameter size drill.  This way, I can tap the rollers out after they've been machined.  It will be tedious doing it this way as I'll have to re-indicate the fixture for every batch.
Picture
Milled the steps and drill through to tap out the rollers after machining.
Picture
Started milling and broke my 1mm carbide endmill... I've no more in the box and have to get one after the long weekend...
Picture
The tip of the stylus is 1.90mm. My trusty Proxxon parallel used as the plate for accurate Z height touch off.
Picture
With the measurements, I redo the blank in 3D.
Picture
Thank God that Mike opens on Saturday, despite being eve of our National Day! Rushed down in the afternoon to purchase 2 x 1mm carbide endmills. The Garryson endmills are a few dollars cheaper than those Mitsubishi endmills. I bought a 2mm from Horme and paid slightly more than $20 for it. Garryson's was only $16+ inclusive of GST.
Picture
Didn't quite cut through but easy enough to push the unwanted portion out.
Picture
The back before deburring.
Picture
After more deburring.
Picture
Test fit. Very tight but now I'm able to remove it by lightly tapping from the drill hole.
Picture
Had some time to spare and so made myself a stylus to help as a touch probe.
Picture
To get the flat land within the 2 chamfers, I first touch off the flat portion, lift Z off by 0.1mm, and proceed to touch off the X axis at the rim and hub ends.
Picture
Type 3 based on the new blank in 3D.
Picture
After zero'ing in several times in Z and in the middle of the 5mm bearing hole, I nervously click on Cycle Start.
Picture
After the unwanted portion pushed out with a screw driver.
Picture
Front
Picture
The back looks cleaner...
It was nerve racking watching the mill went round doing its job.  I was so afraid of breaking another endmill.  I was told that with endmill so tiny and my max. spindle speed at 2800 rpm, I should go no more than 56mm/min feedrate and at DOC of 0.2mm per pass.  It will be painfully slow...  For this roller, I went at 100mm/min instead.  It turns out well except having to spend quite some time deburring the tiny spokes.  With my "old flower eyes" (long sightedness, started when I crossed 40...), it was painfully difficult.

Next up, upgrading the Sherline to 10,000 rpm pulley.
0 Comments

Acrylic Fixture Plate For The Rollers - Part 1

2/8/2015

0 Comments

 
I finally got a reply from the Thai hobbyist who posted his setup of milling the Tamiya 4WD rollers! It was after my family dinner yesterday that I requested my sister in law, whom is s Thai, to help type the message in Thai on his Instagram. He responded rather quickly this time and with good English... lol. Anyway, he shared that he cut the shapes in acrylic 0.05mm undersized.
The roller blanks were then tapped in with a soft mallet of sort.

I dug through the pile of acrylic sheets I bought several years ago and found a suitable piece to make the fixture with.  It measures 200 x 100 x 10mm.  I did up the CAD drawing of what I need and went to work with the CNC mill.

The pics will tell the rest of the story...


Picture
The acrylic plate can hold up to 10 rollers at the same time. I've not decided if I'll be milling 5 of them for the ringless type of rollers and 5 with the plastic ring. Will confirm later. The dimensions in inches are to match up with the 10-32 holes on my High Tech Systems Matrix Plate. This will also be a test of the accuracy of the A2Z lead screws.
Picture
Rough marking of the acrylic sheet just for the fun of it.
Picture
The step clamps were used to hold the acrylic plate down. A thin piece of MDF of roughly the same size as the acrylic plate was used to protect the matrix plate.
Picture
To centre the spindle to part zero of the plate, I used the edge finder to locate the X and Y axes. For Z, I clamped one of the wire of the touch off probe to my trusty Proxxon parallel and the other wire to the spindle. Very accurate way of finding Z height.
Picture
Drilling started after centre drilling.
Picture
4mm endmill was used to mill out the counterbores for the 10-32 SHCS.
Picture
Job done! I just couldn't help it but to tear away the cover of the plate. Time to see if all the holes line up. If not for the coolant stain, the acrylic plate looks very nice with the counterbore holes.
Picture
Perfect! All 8 holes lined up accuately. The SHCS are flushed with the surface! Though I've 8 holes done, I'm likely to just use 4 to hold the plate down.

Once I figure out what I can do to quickly zero in my spindle to the plate, I'll mill the circular recess to fit the rollers and start the job in batches.  Maybe I can drill a hole at, say, (5, 5) and press in a short section of a hollow metal tube.  This will help to dial in my X and Y axes.  As for the Z axis, maybe I can glue a piece of thin metal sheet of known thickness for the touch off.

The only concern I've is how much force is needed to pop the finished parts out of the recess.  The recess will be about 2.2mm deep and the thickness of the roller 2.36mm.  I'll sleep over these and hopefully wake up tomorrow morning with some answers.

Alright guys, keep your machines running and chips flying!


0 Comments

Tamiya 19mm Rollers - Almost There

1/8/2015

0 Comments


Busy day today at home. We hosted steamboat lunch and dinner at home for my wife's family and mine. I sneaked into the workshop in the afternoon to figure out how to use the centering indicator I bought many years back. This round, I managed to figure it out.

I sought for suggestions and help over at MetalworkingFun forum. Those guys there are just superb! Suggestions poured in and with so much patience! Very friendly bunch of people. The thought of using double sided tape came to my mind when a gentlemen the spoke about using some kind of tar to hold the rollers while machining. Bought a big roll of "super sticky double sided tape" from Horme after dropping my colleague off yesterday. This round, the roller didn't move! One problem down. The next to figure out is how to zero my part more accurately. Check out the pics of the finished rollers and you'll know why.

Picture
Centering the roller using the centering indicator. Lim dialing in to the fixture which was turned in one setup. So I would assume that the nip holding the inside of the roller is concentric with the turned OD of the fixture.
Picture
After zero'ing the axes.
Picture
The actual cutting job was completed very quickly.
Picture
The double sided tape after the part being removed.
Picture
After some cleaning up. Much nicer than the first piece I did.
I'm quite happy with the result from the 2nd attempt. Closer inspection of the part revealed that I may not have found the exact zero of the axes though I'm very close. I'll do the next 5 and submit for testing before moving to the next spoke design.

My dad has also commissioned me to make a batch of stainless steel bushings for his dispenser. I'd the CAD done last night and should be able to machine a test piece next week to check fit.

Be blessed!


0 Comments

    Enter your email address:

    Delivered by FeedBurner

    Categories

    All
    3d Printer
    Er32 Collet Chuck Proxxon
    Misc
    Misc Projects
    Projects
    Proxxon Pd400
    Sherline / A2Z Monster Mill
    Things I Bought
    Wabeco Mill

    Archives

    June 2018
    January 2017
    December 2016
    August 2015
    July 2015
    June 2014
    May 2014
    December 2013
    November 2013
    October 2013
    June 2013
    March 2013
    February 2013
    November 2012
    October 2012
    September 2012
    August 2012
    July 2012
    June 2012
    May 2012

    RSS Feed

Powered by Create your own unique website with customizable templates.