I finally got a reply from the Thai hobbyist who posted his setup of milling the Tamiya 4WD rollers! It was after my family dinner yesterday that I requested my sister in law, whom is s Thai, to help type the message in Thai on his Instagram. He responded rather quickly this time and with good English... lol. Anyway, he shared that he cut the shapes in acrylic 0.05mm undersized.
The roller blanks were then tapped in with a soft mallet of sort.
I dug through the pile of acrylic sheets I bought several years ago and found a suitable piece to make the fixture with. It measures 200 x 100 x 10mm. I did up the CAD drawing of what I need and went to work with the CNC mill.
The pics will tell the rest of the story...
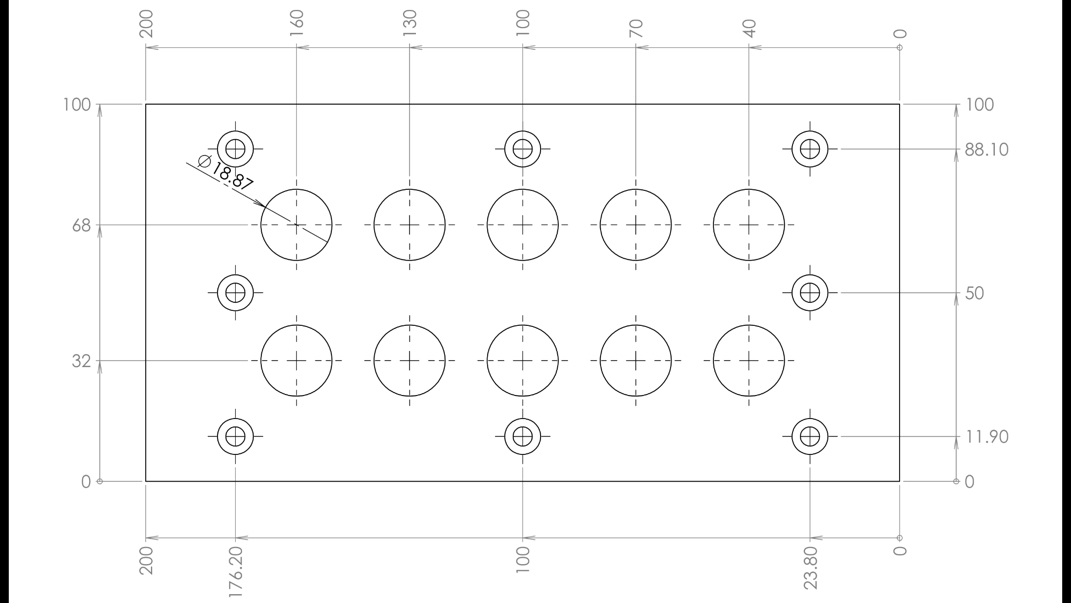 The acrylic plate can hold up to 10 rollers at the same time. I've not decided if I'll be milling 5 of them for the ringless type of rollers and 5 with the plastic ring. Will confirm later. The dimensions in inches are to match up with the 10-32 holes on my High Tech Systems Matrix Plate. This will also be a test of the accuracy of the A2Z lead screws. | 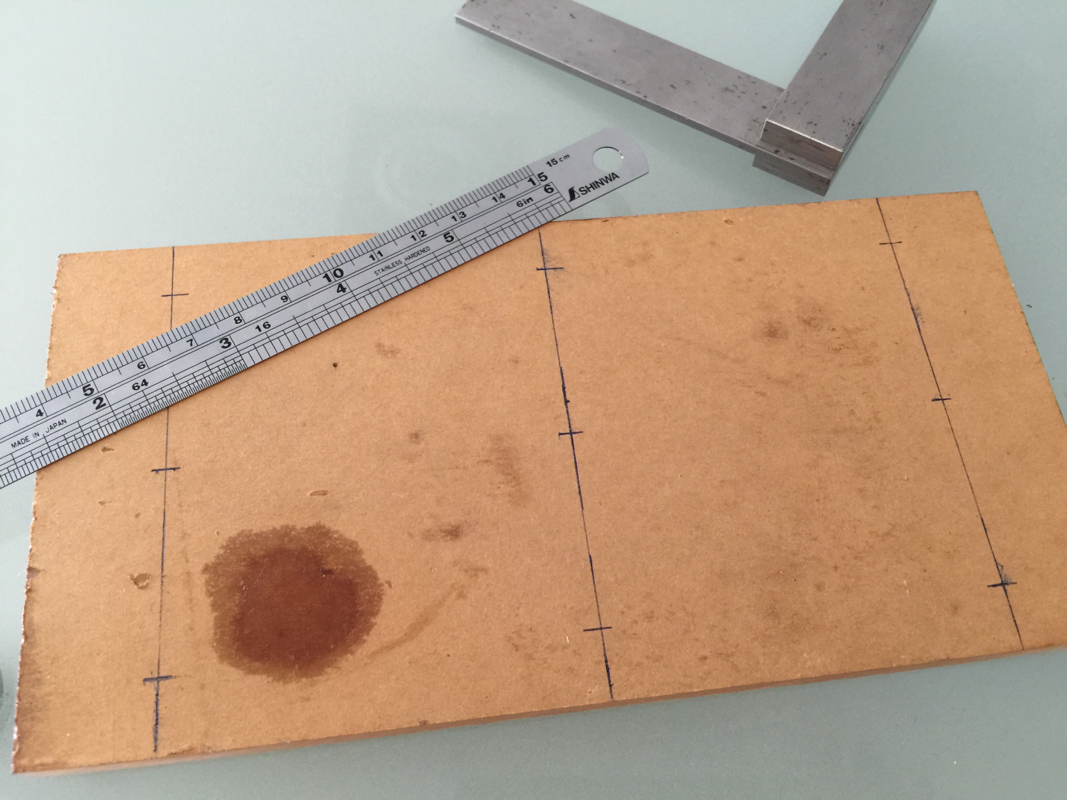 Rough marking of the acrylic sheet just for the fun of it. |
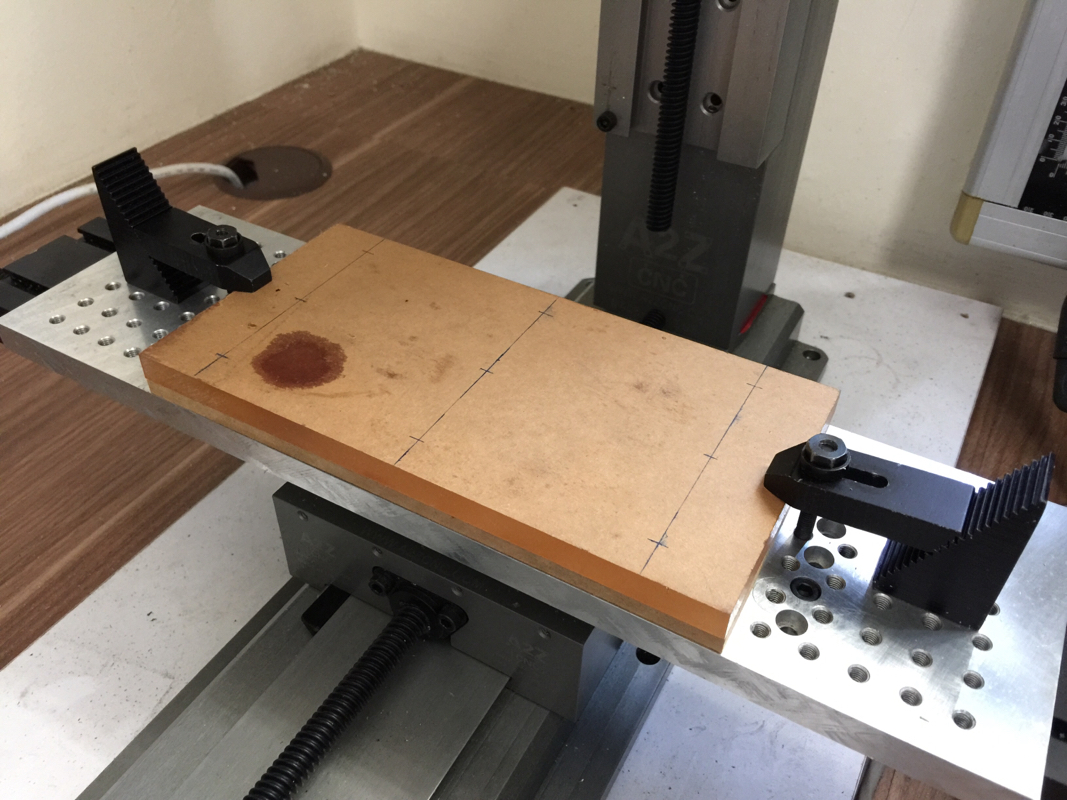 The step clamps were used to hold the acrylic plate down. A thin piece of MDF of roughly the same size as the acrylic plate was used to protect the matrix plate. | 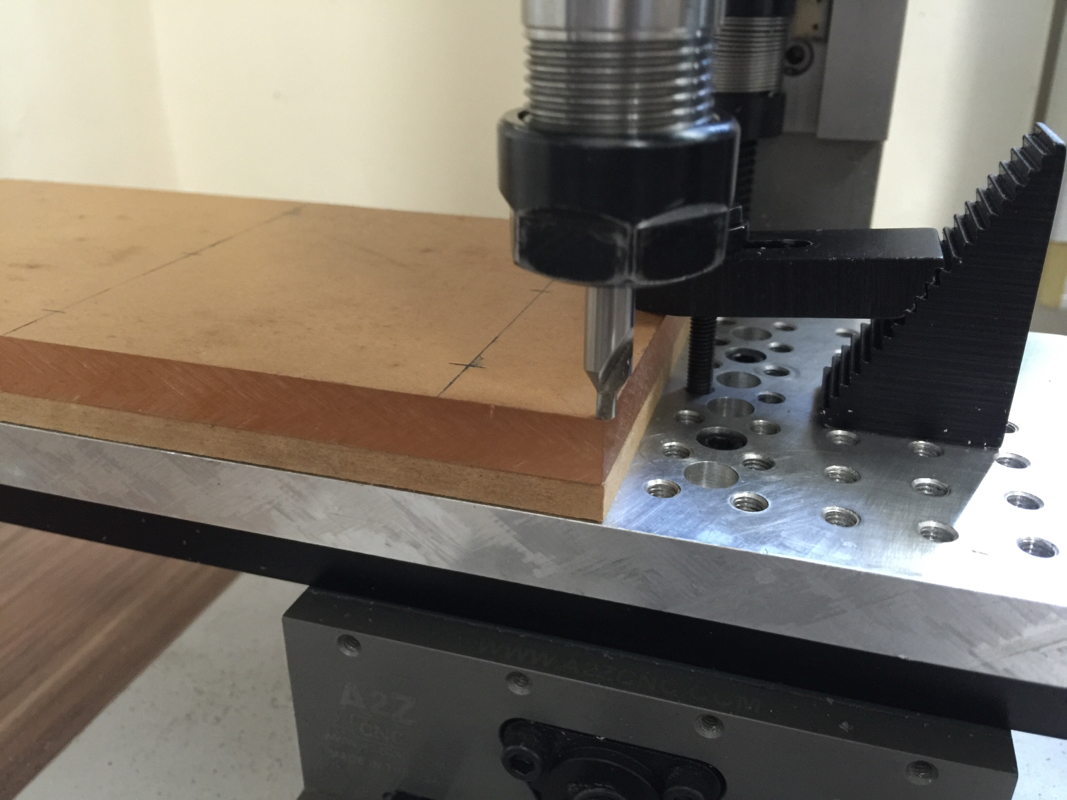 To centre the spindle to part zero of the plate, I used the edge finder to locate the X and Y axes. For Z, I clamped one of the wire of the touch off probe to my trusty Proxxon parallel and the other wire to the spindle. Very accurate way of finding Z height. |
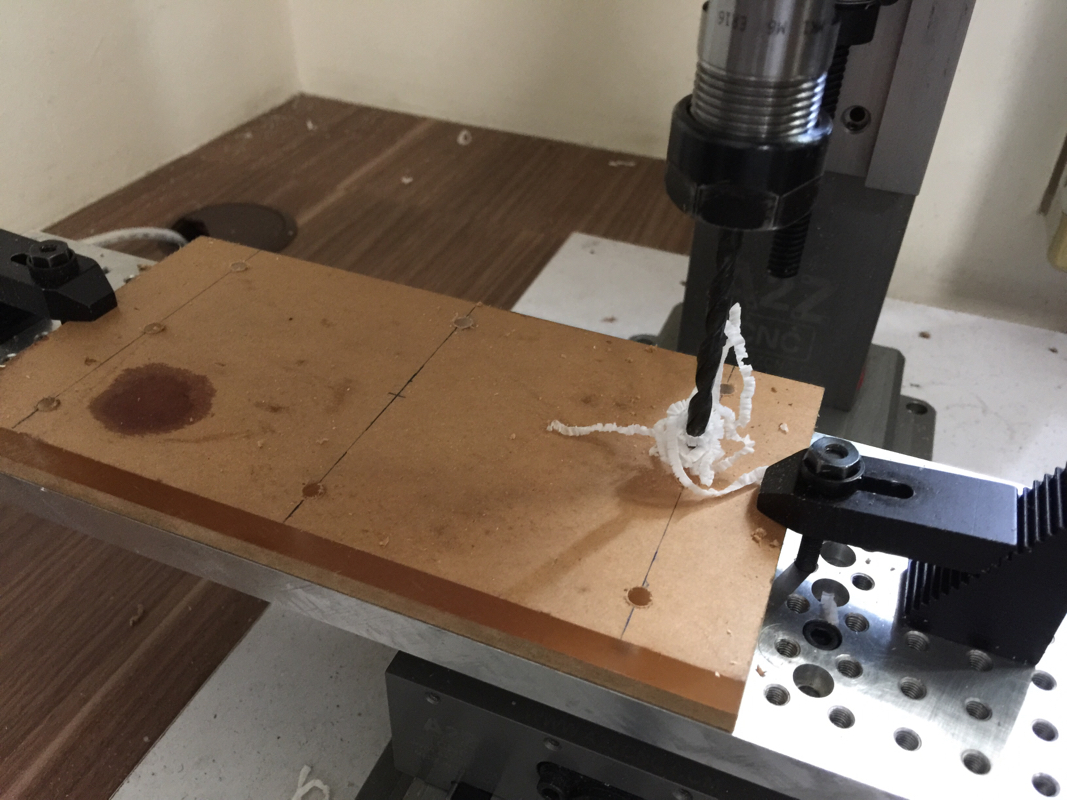 Drilling started after centre drilling. | 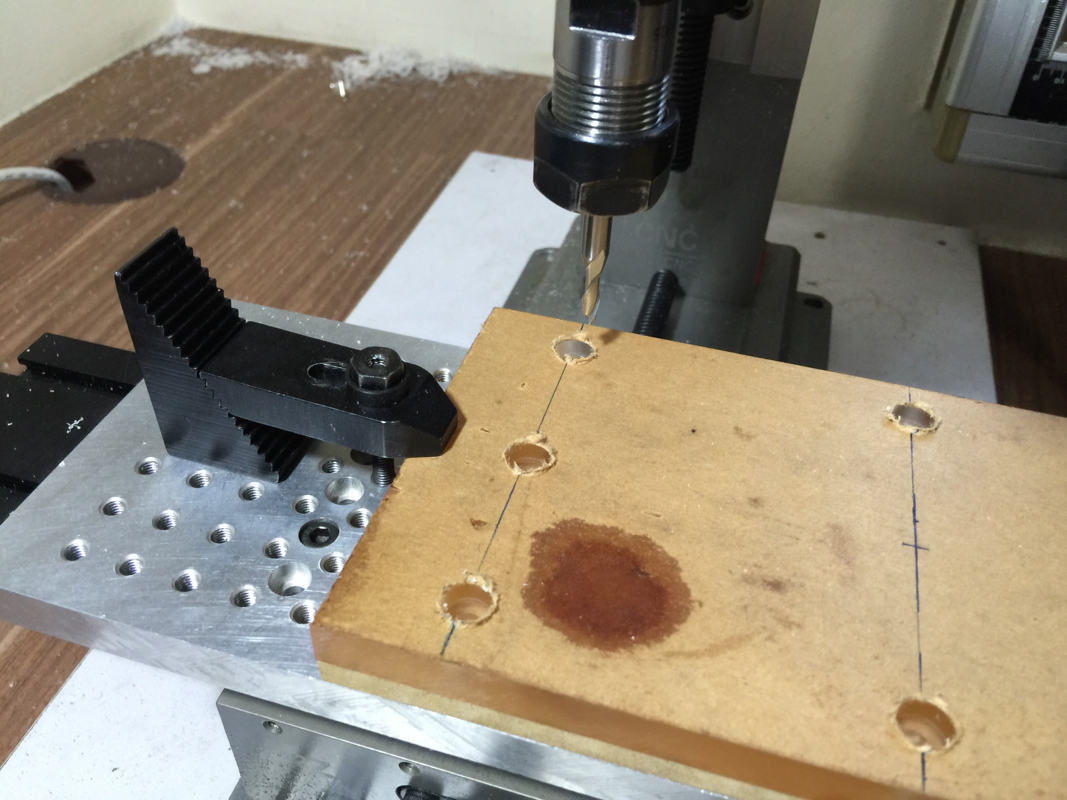 4mm endmill was used to mill out the counterbores for the 10-32 SHCS. |
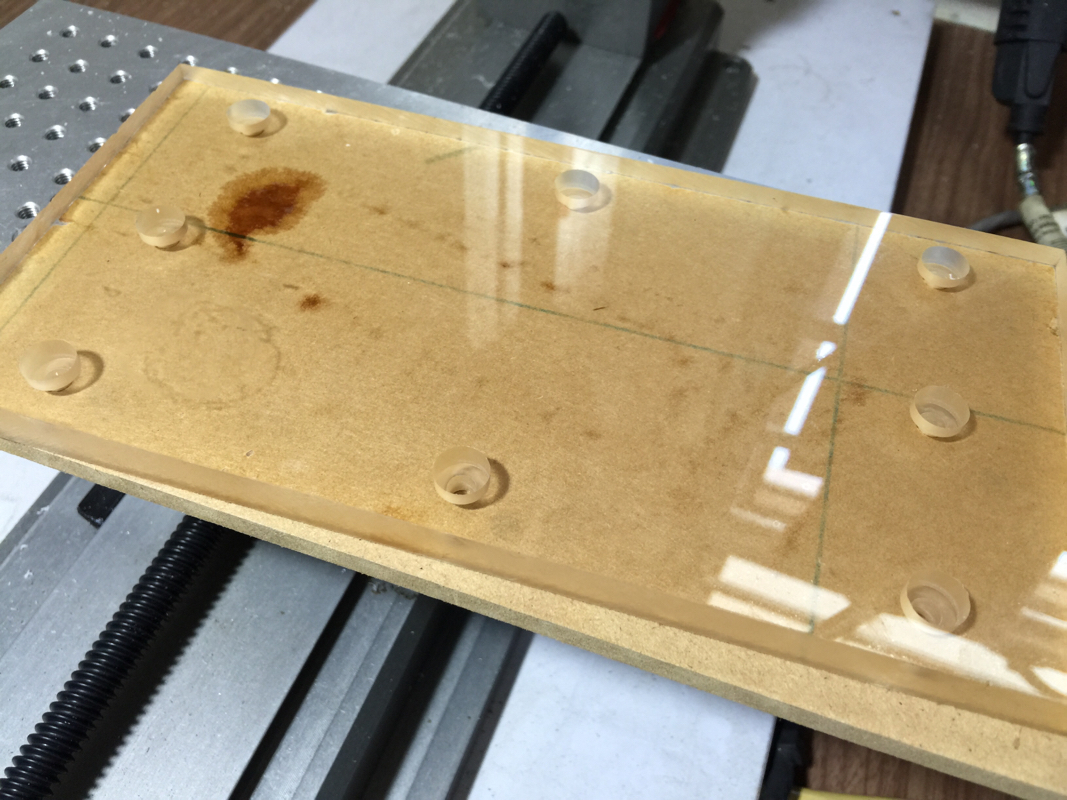 Job done! I just couldn't help it but to tear away the cover of the plate. Time to see if all the holes line up. If not for the coolant stain, the acrylic plate looks very nice with the counterbore holes. | 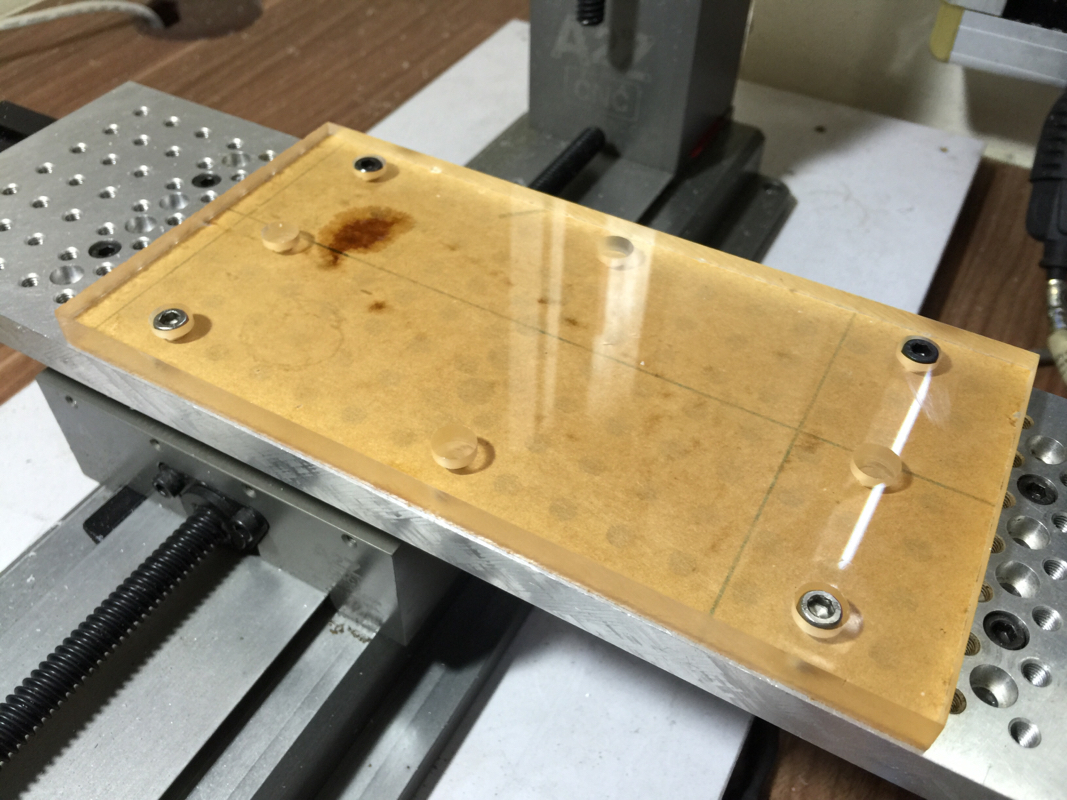 Perfect! All 8 holes lined up accuately. The SHCS are flushed with the surface! Though I've 8 holes done, I'm likely to just use 4 to hold the plate down. |
 RSS Feed
