Wongster's Production
Share it on
  • Home
  • Blog
  • My Old Blog
  • My Shop
  • Resources
  • About Me...
  • Contact Wongster

Mini Kossel: Carriage Wheels

18/11/2013

0 Comments

 
The trial in making the wheels started on Saturday and Sunday for a couple of hours each day.  Some pix were taken but I didn't have the time to update the blog till now.  Just returned from the A&E of Changi General Hospital which we spent the last 4 plus hours waiting for the doctor to administer treatment to my poor little Ruth.  Her fever went back up Monday night and she started bleeding from her left nose.  We panic and drove her straight to A&E after midnight.  The wait was rather long with more time spent waiting for the result of her blood test to be out.

Ruth is such a brave girl.  Despite the pain and discomfort, she allowed the doctor to draw blood from her without once pulling back her arm.  I'm so proud of her!

As I was to send our helper to the airport in about 2 hours time for her trip back to Myanmar, I gave up the idea of sleeping - and so this blog entry.

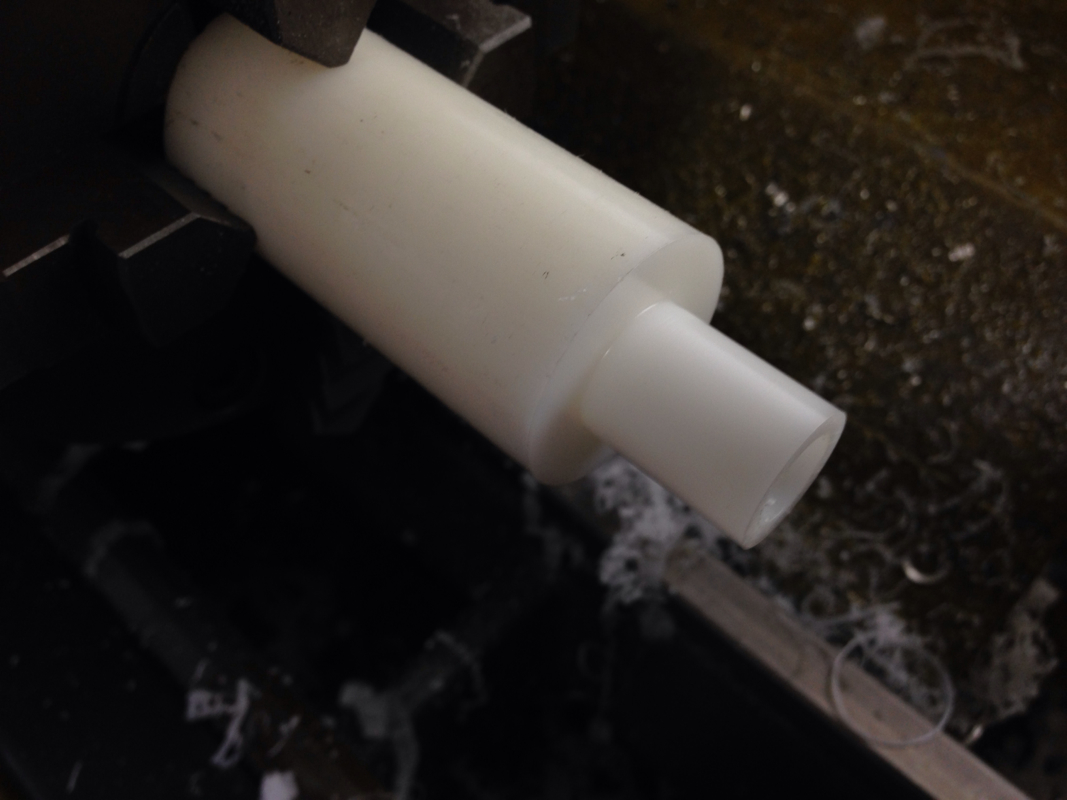
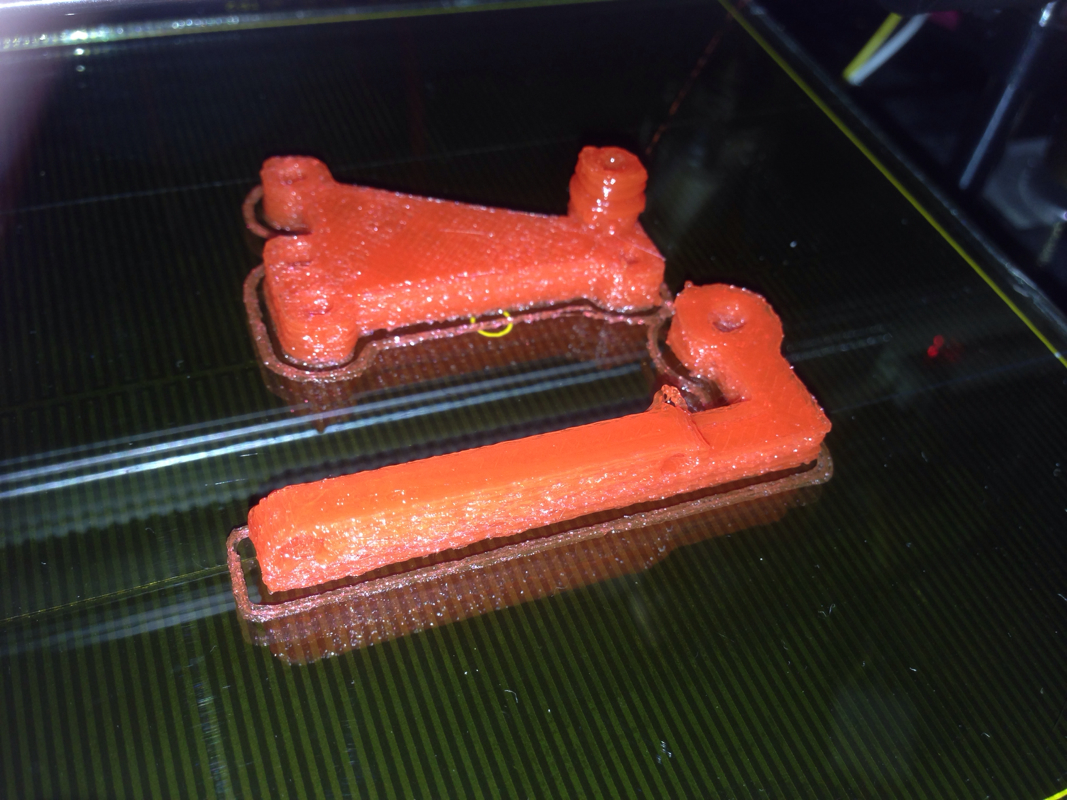
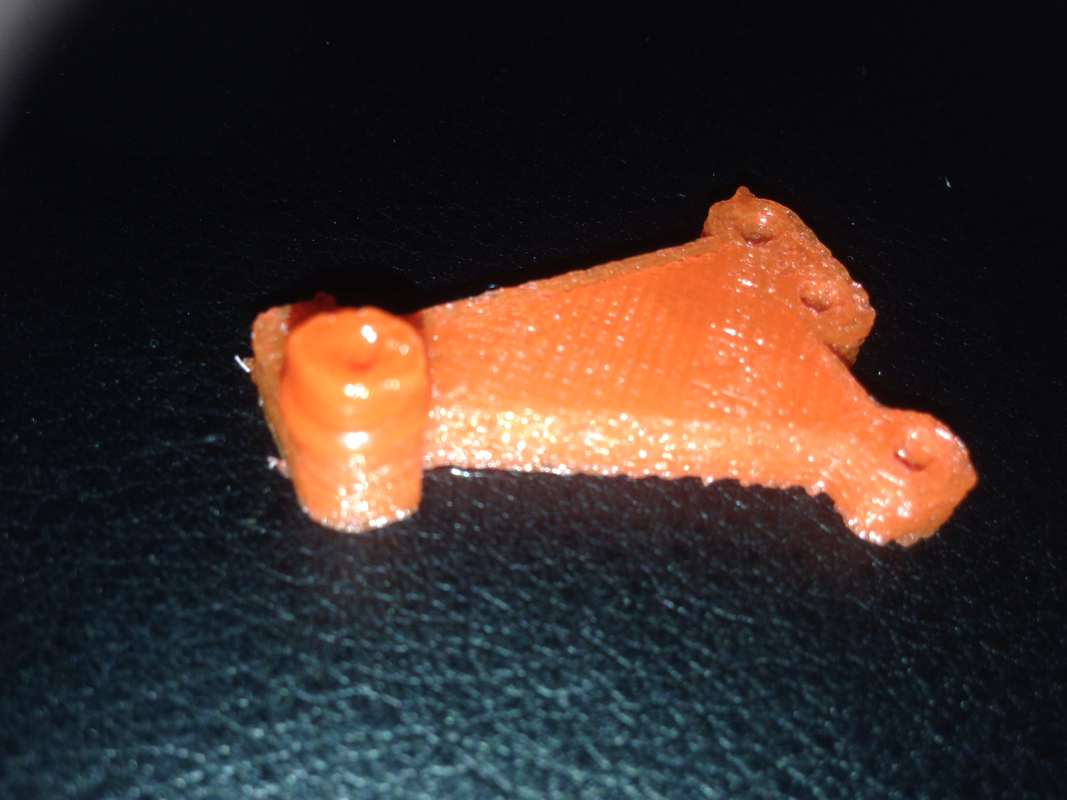
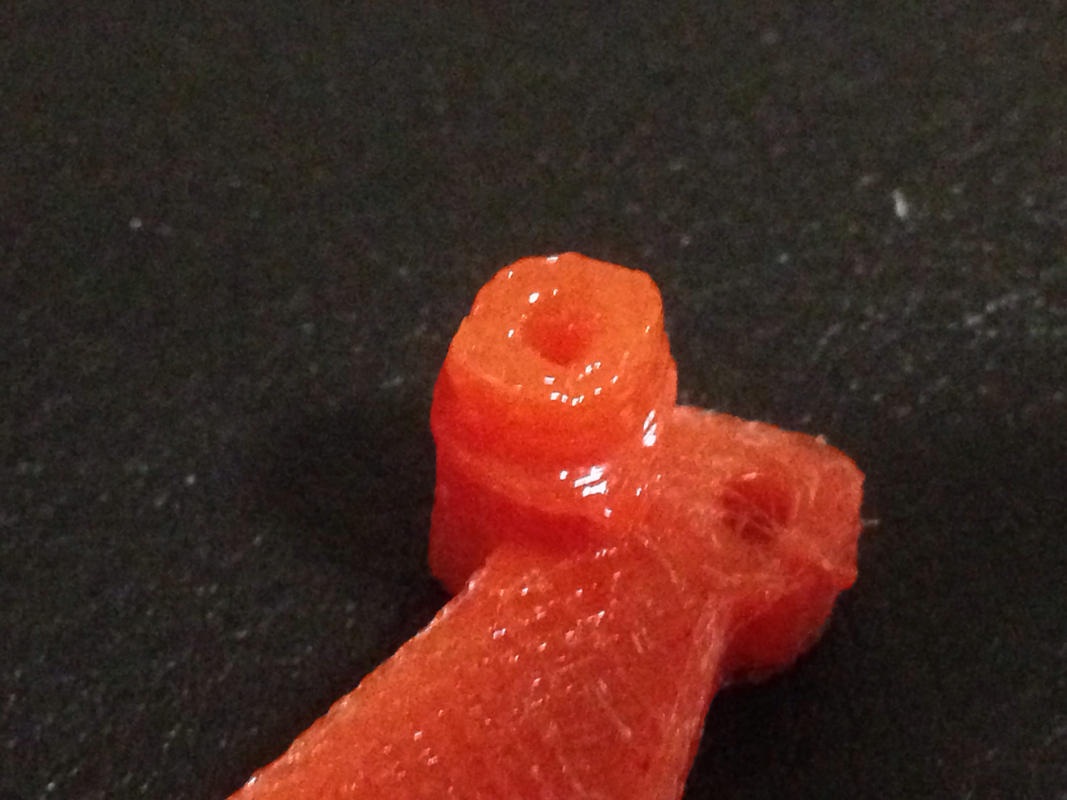
Terrace provided me with a length of delrin of about 28.6mm diameter.  I felt bad as it will be such a waste of the expensive plastic as the final diameter of the wheels will only be 15mm.  He explained that it was meant for another project of his which didn't happen and so using it for this purpose - felt so much better after learning this.

On with the pix.  
Picture
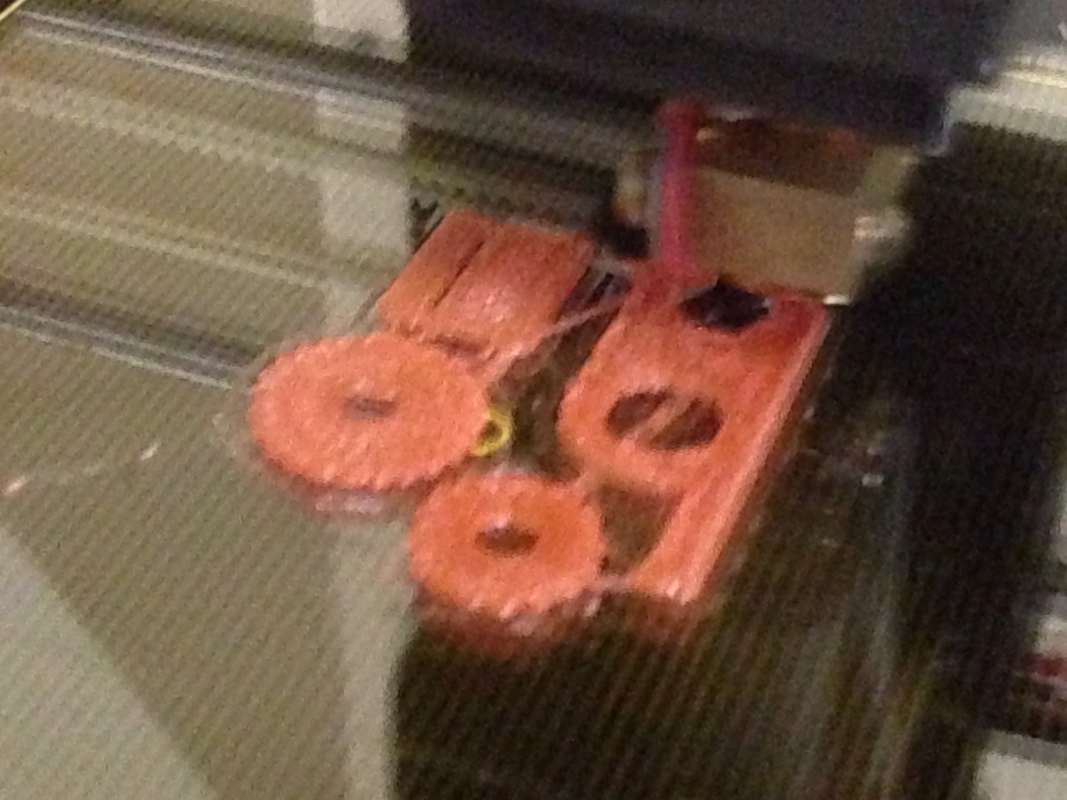
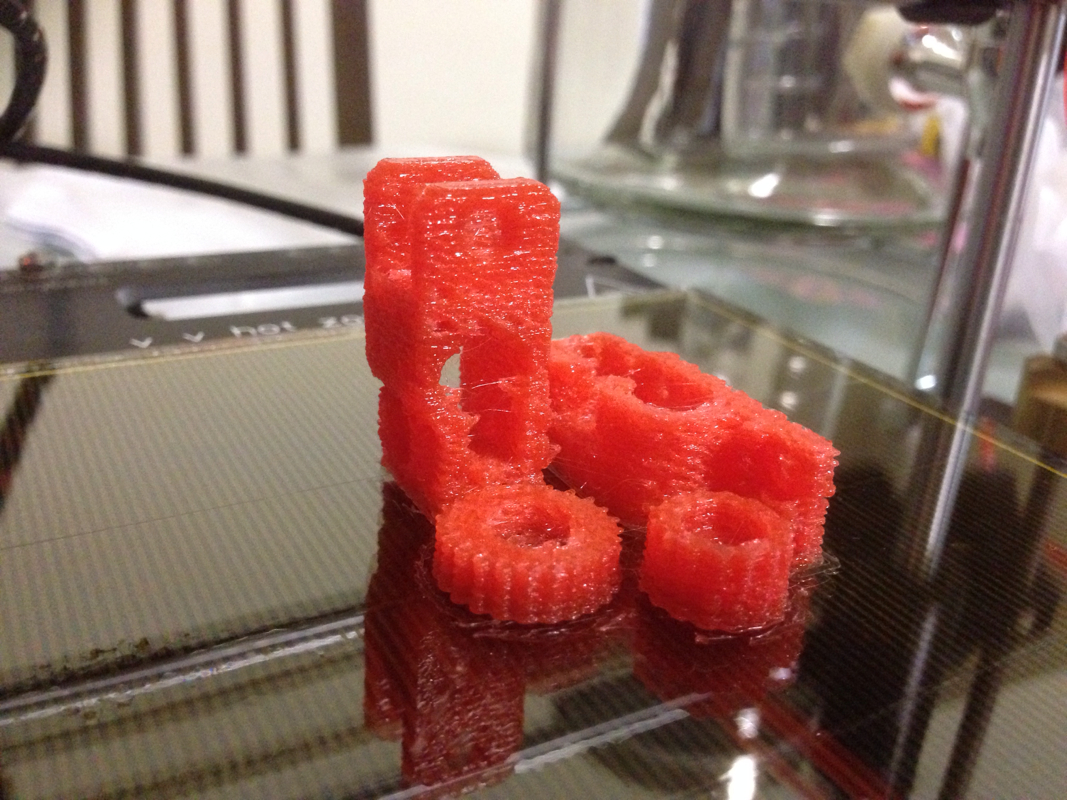
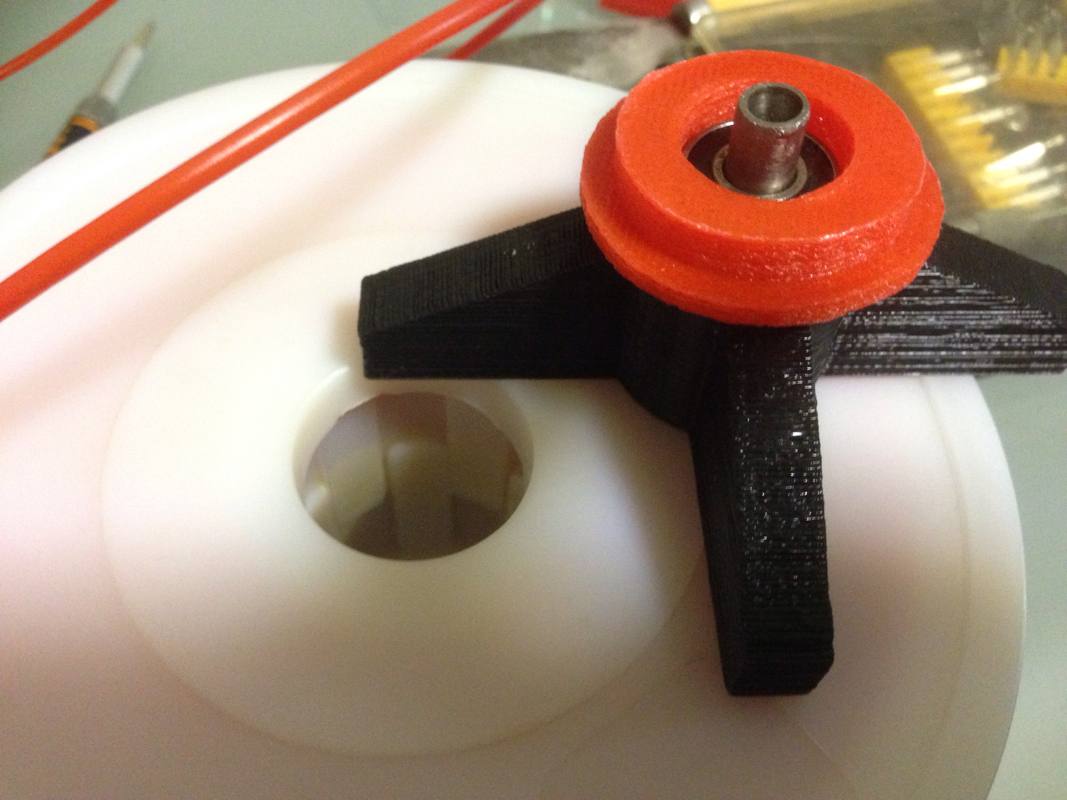
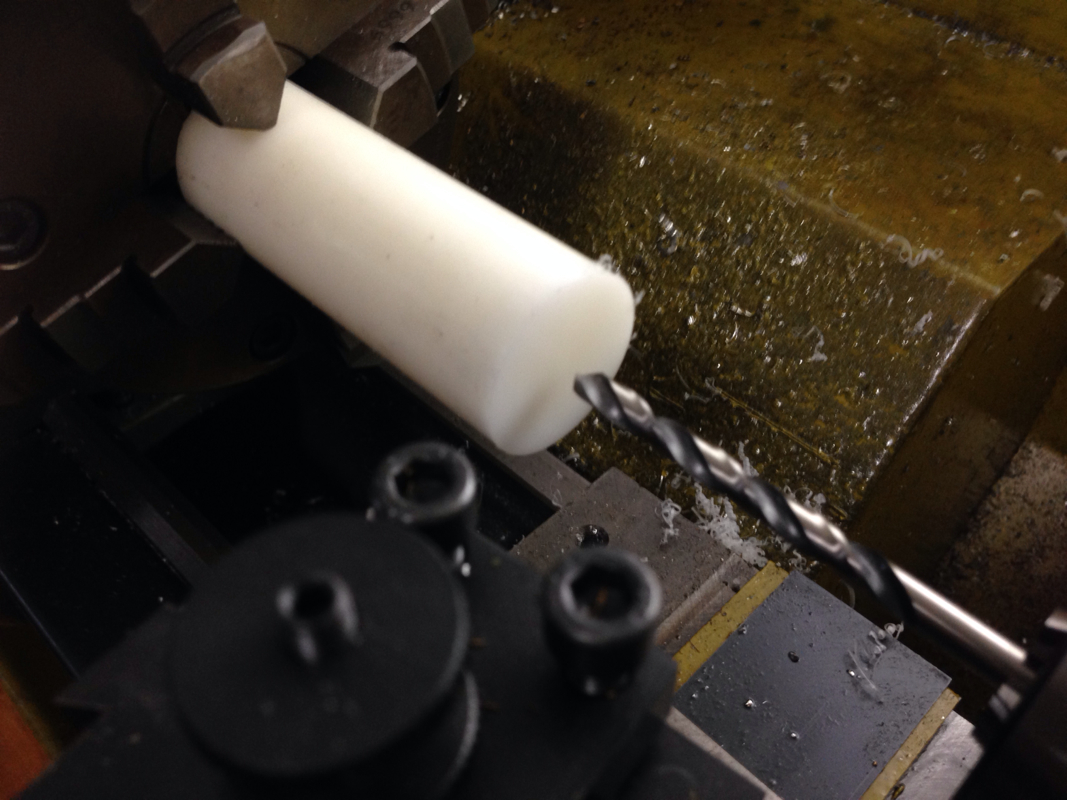
A short section was chopped off at the bandsaw and chucked into the lathe. Both ends were faced. As the material is softer than what I usually play with, I went straight with the 3/8" drill. It cut through like butter!
Picture
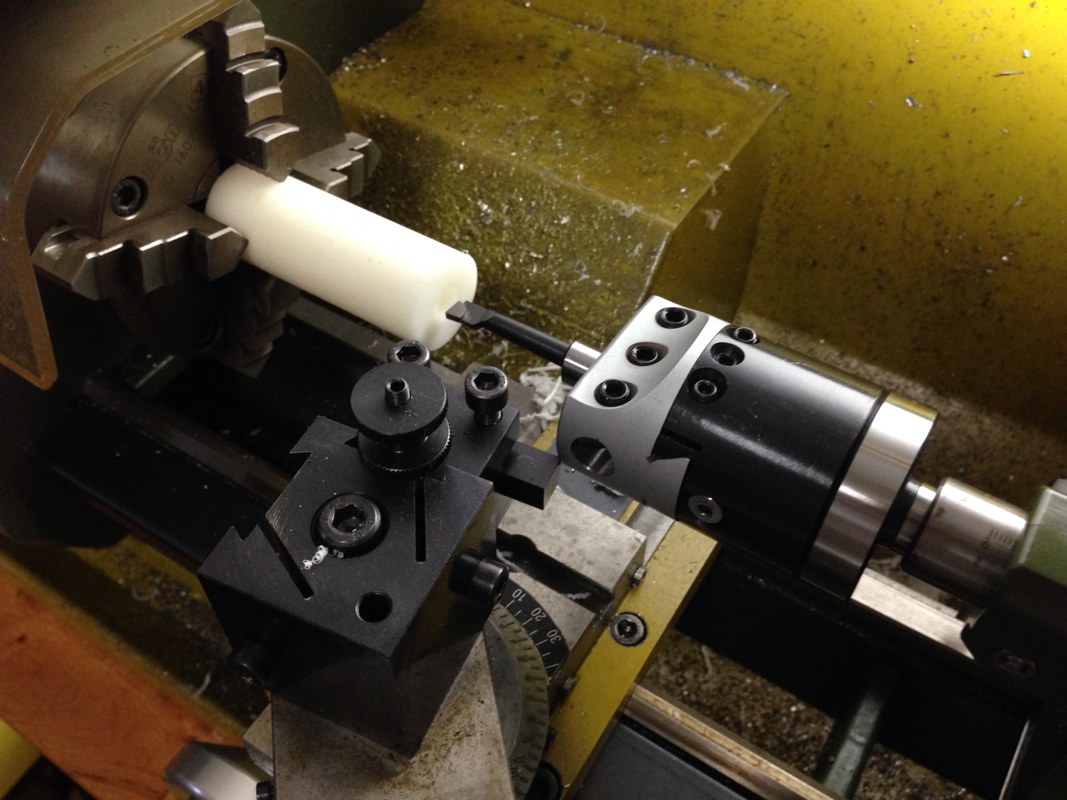
Next came boring to ID of 10mm to fit the bearings. I target at 9.95mm to press fit the 2 bears into it. I wanted to try using the boring head I bought from CTC Tools but the dial to adjust the boring head was facing the wrong side if I want the clamping capscrews to face up. I may have use the tool the wrong way. Will study it further.
Picture
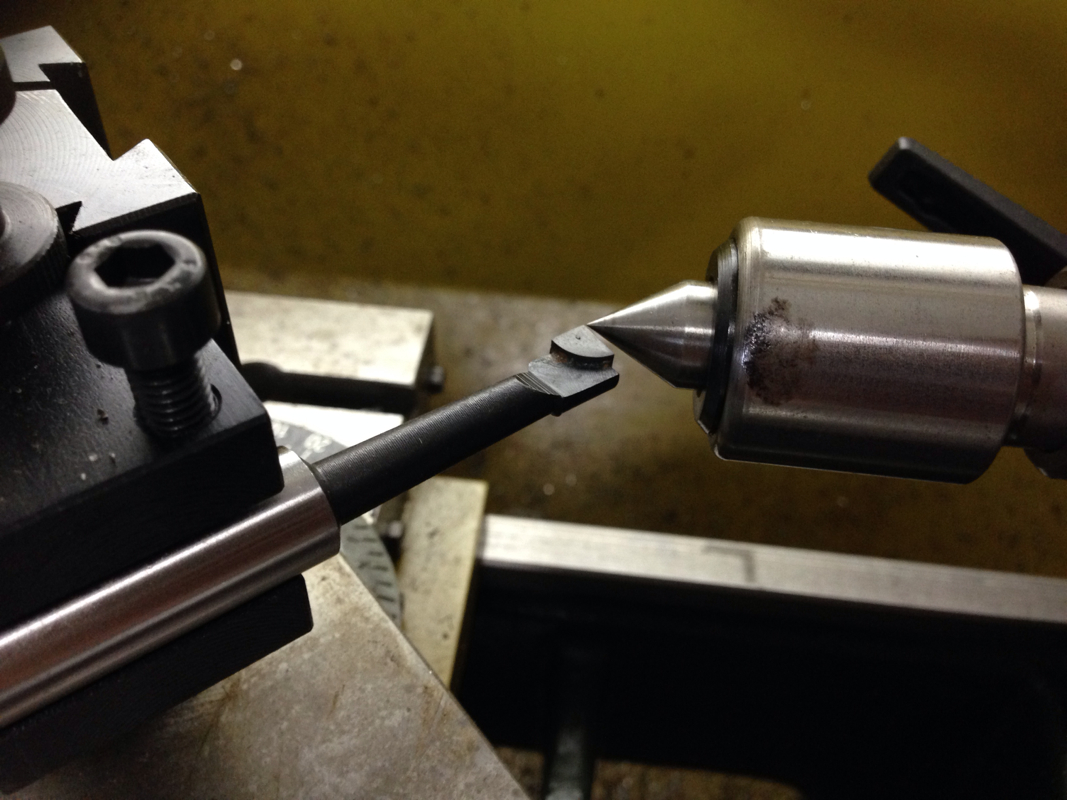
Next I tried putting the boring tool on the QCTP Tool Holder. After setting the height, I find that I can fit it into the hole... Its too big...
Picture
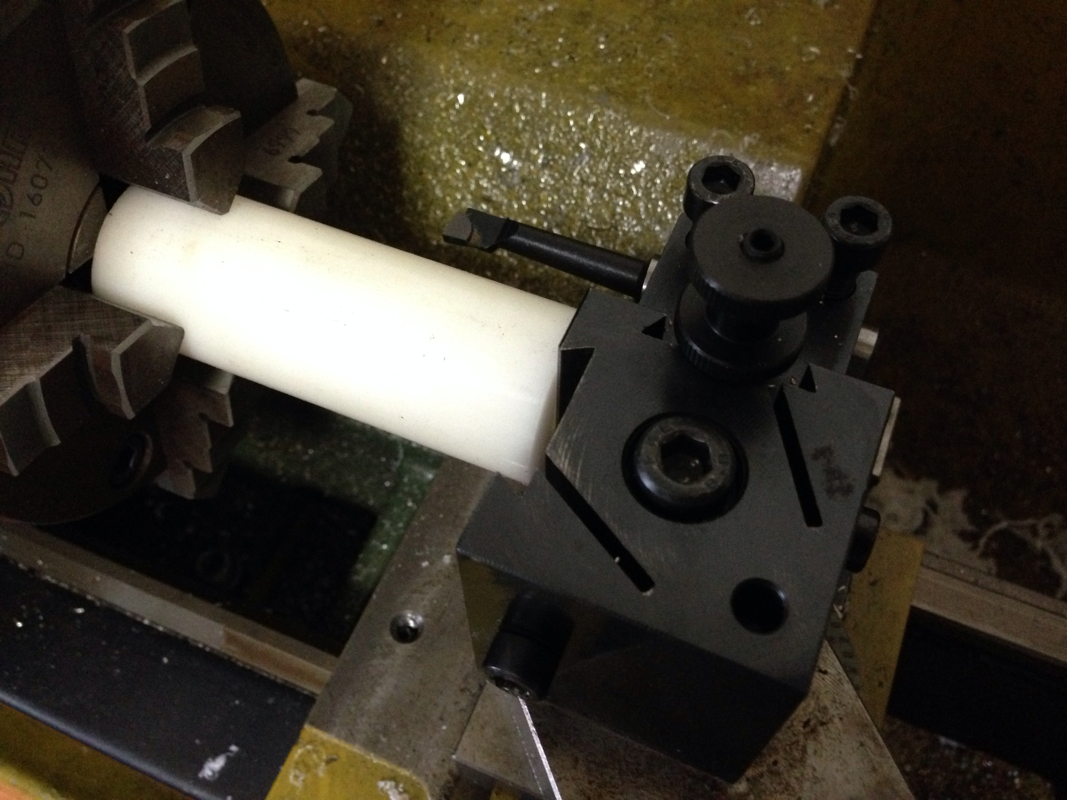
Setting the face of the QCTP square to the faced workpiece.
Picture
I ended up using the micro tool bar my Irish friend bought on my behalf and shipped over. This little tool works very well but a tad too short for this job. So I've to go one wheel at a time.
Picture
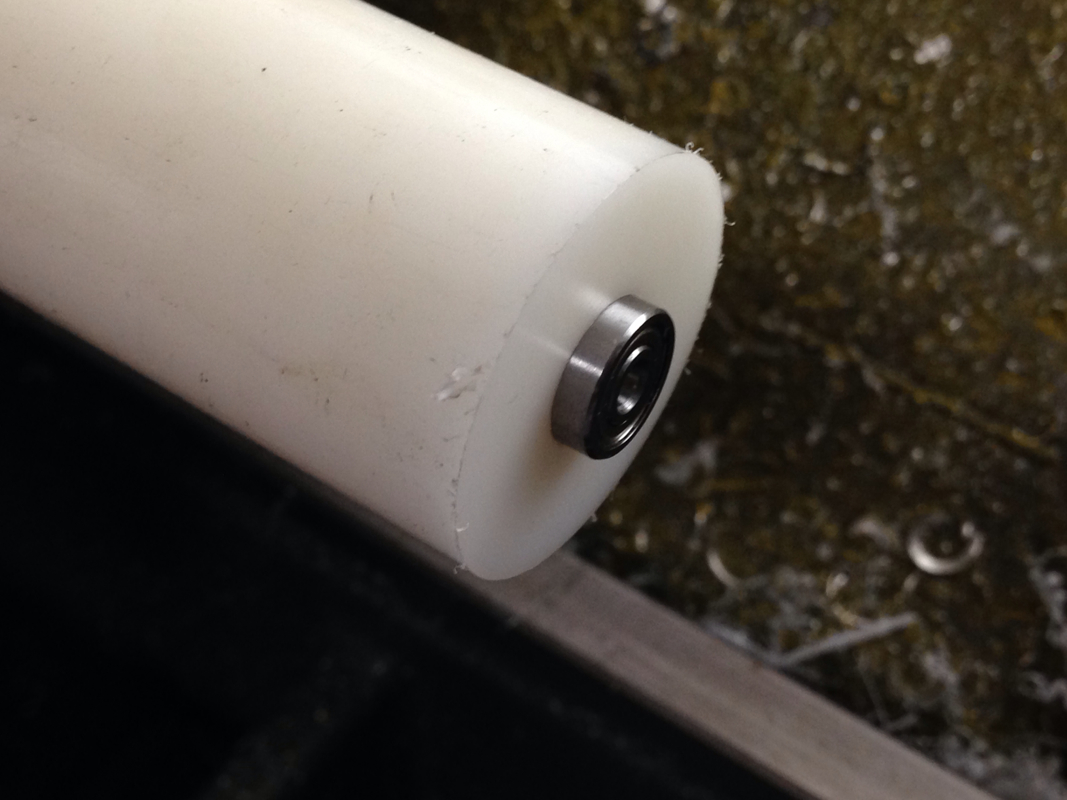
Test fitting the bearing.
Picture
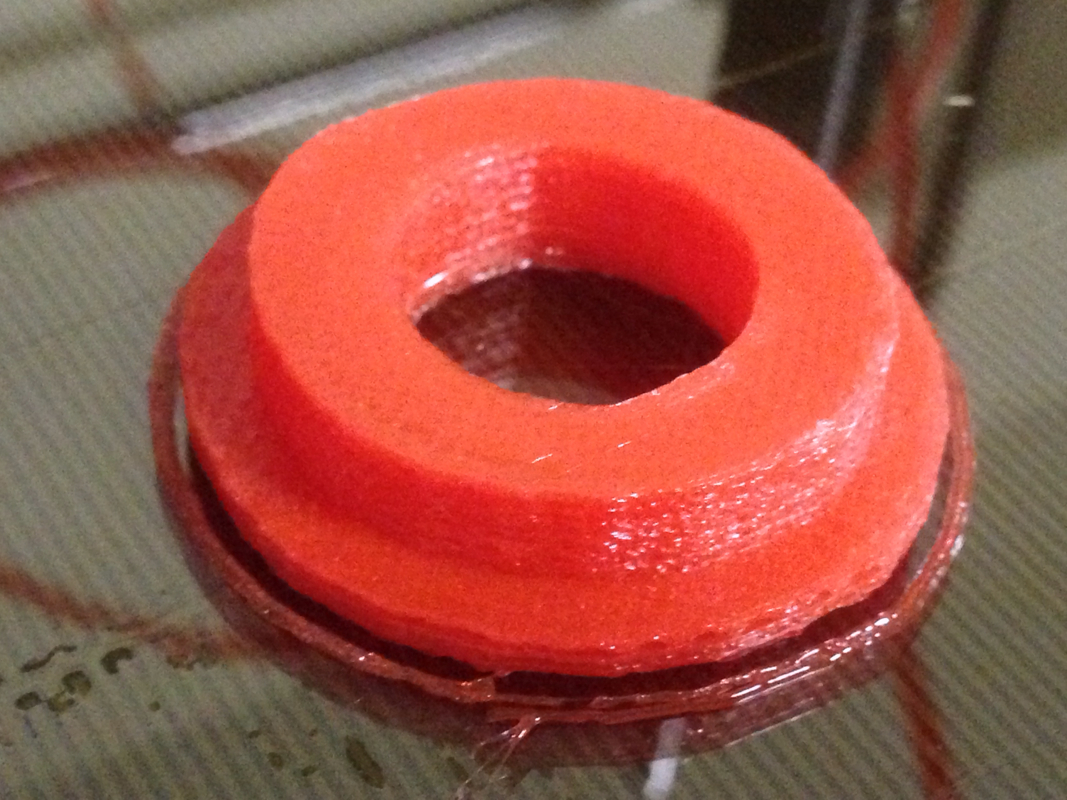
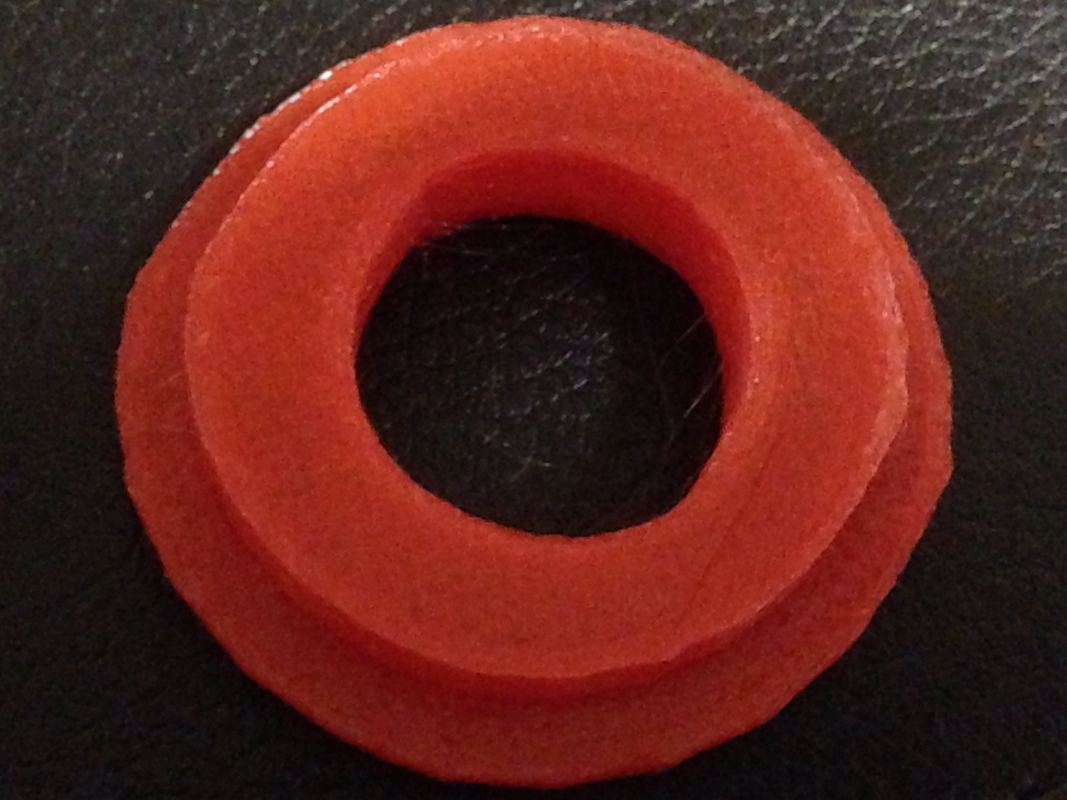
Working on the OD. I didn't expect myself to be able to hit 15mm exactly! At least that was what my 2 decimal places Mitutoyo Digital Caliper said.
Picture
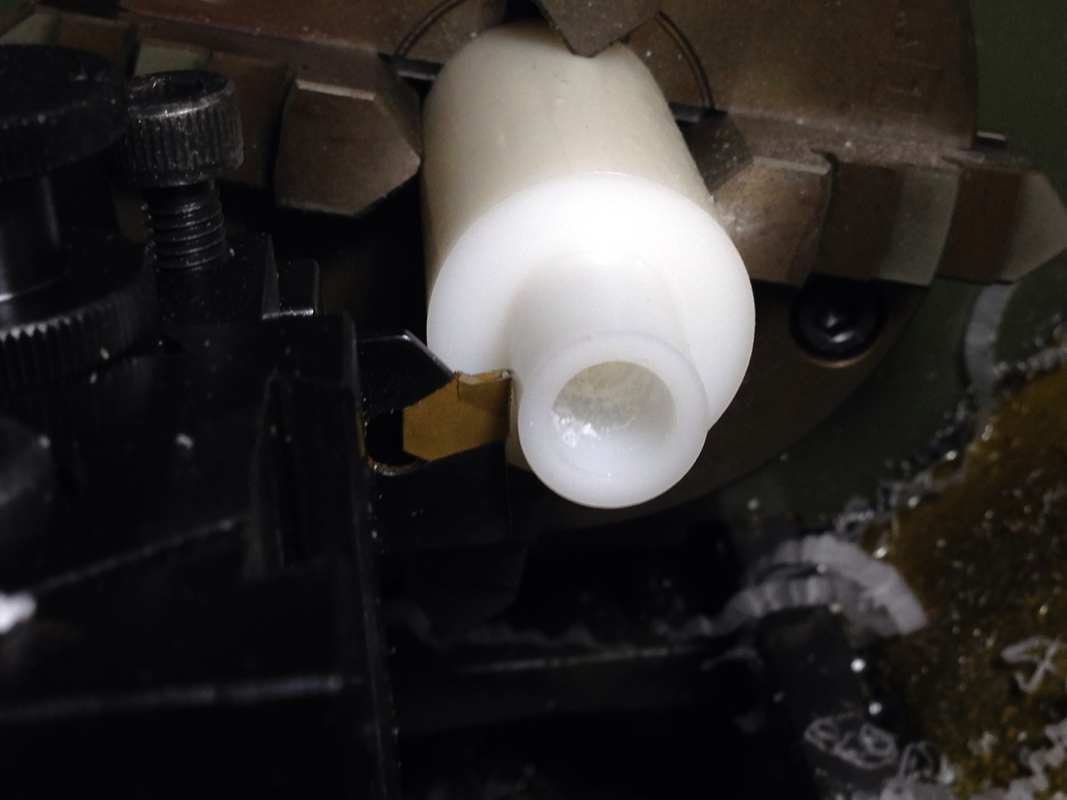
Parting off with the insert tool.
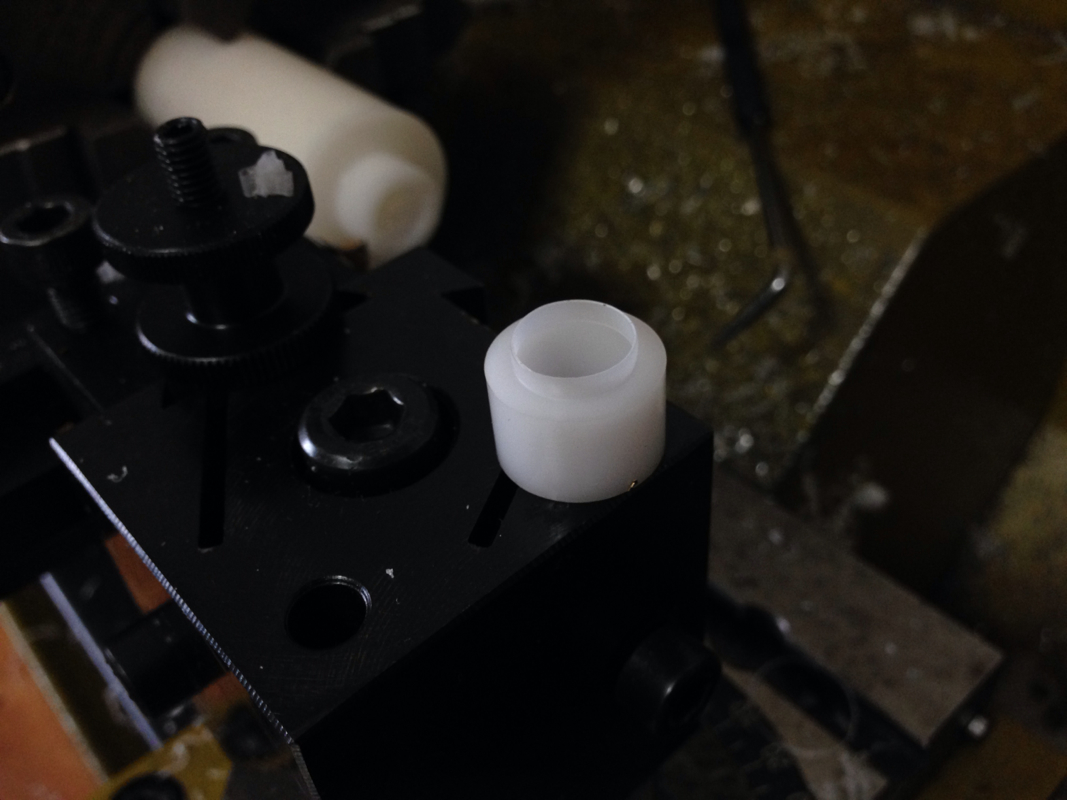
Picture
After parting off.
Picture
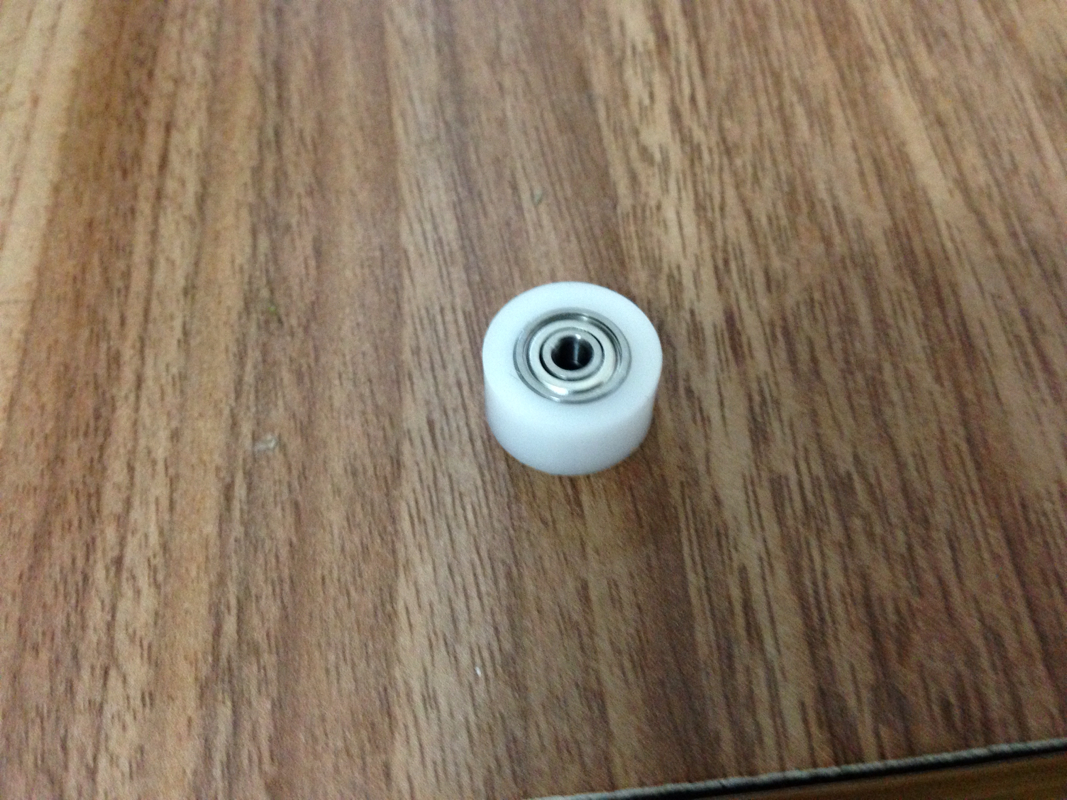
After facing off the other side, the first bearing was fitted. I pressed it in simply using a 123 block. Easy job.
Picture
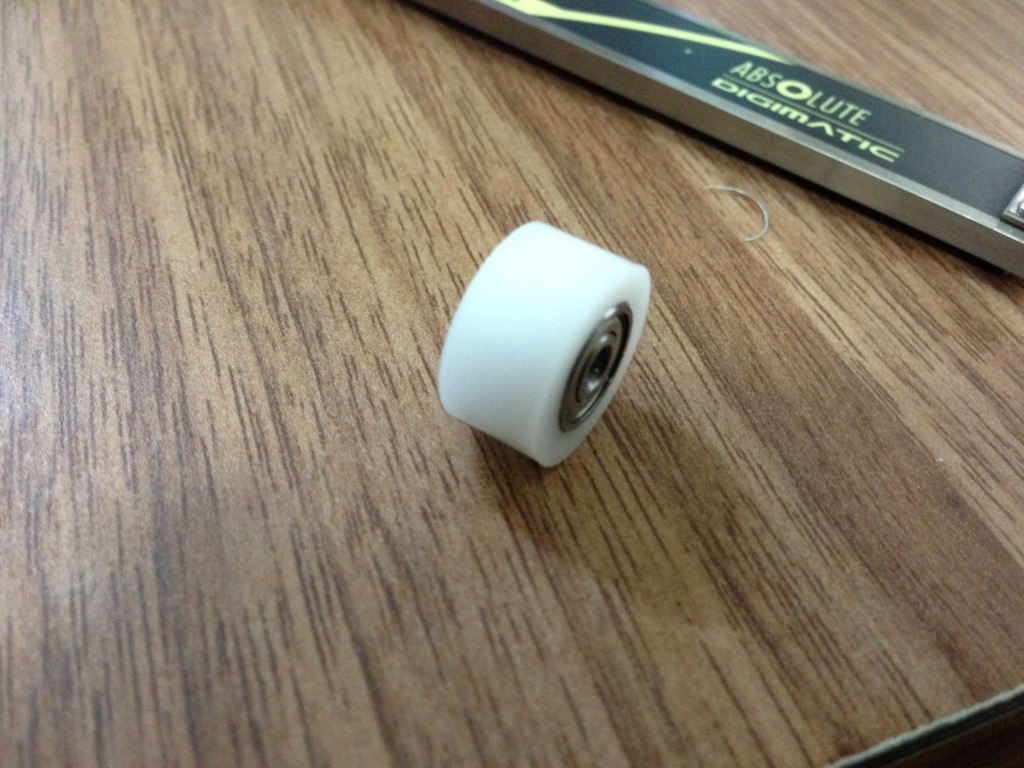
2nd bearing pressed in. To remove the bearings, I've to use a pin big enough so as not to damage the bearings to tap them out.
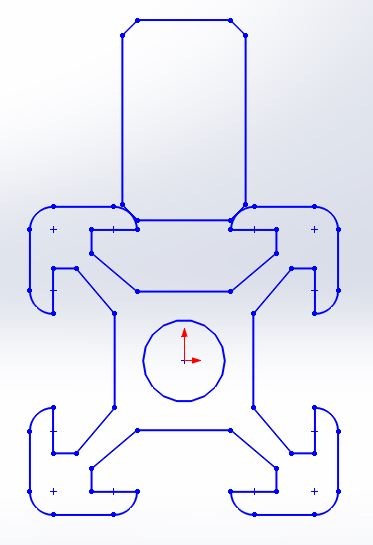
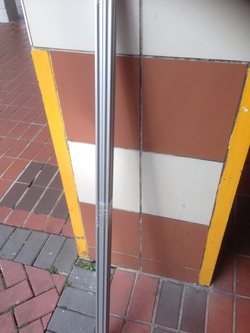
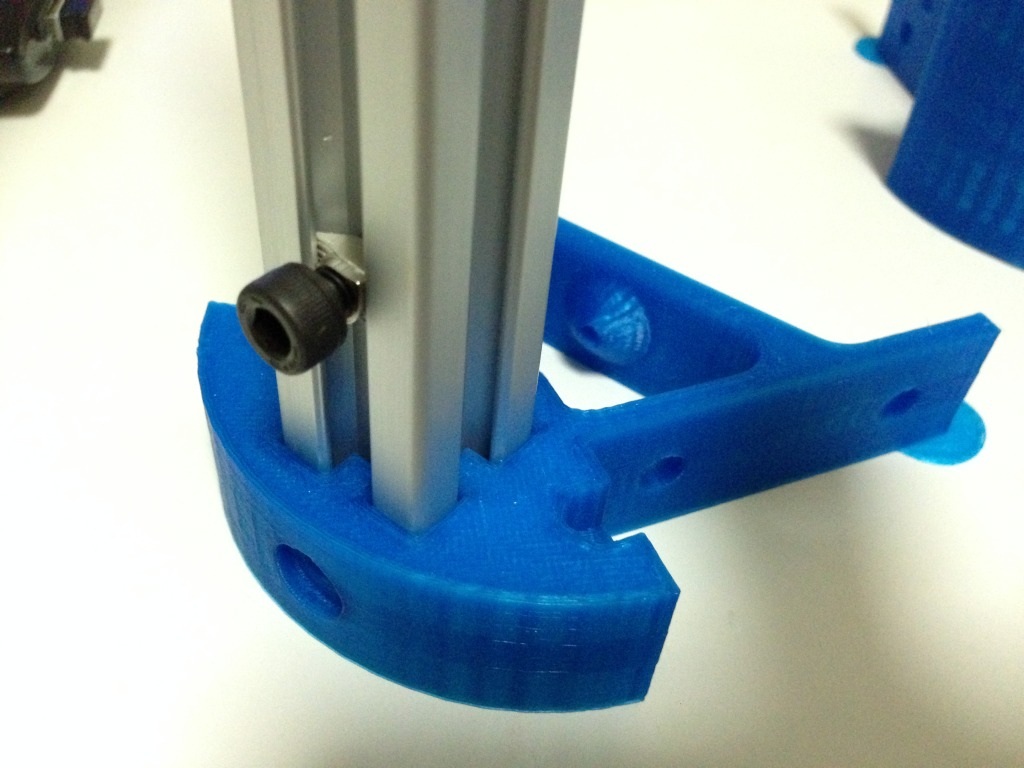
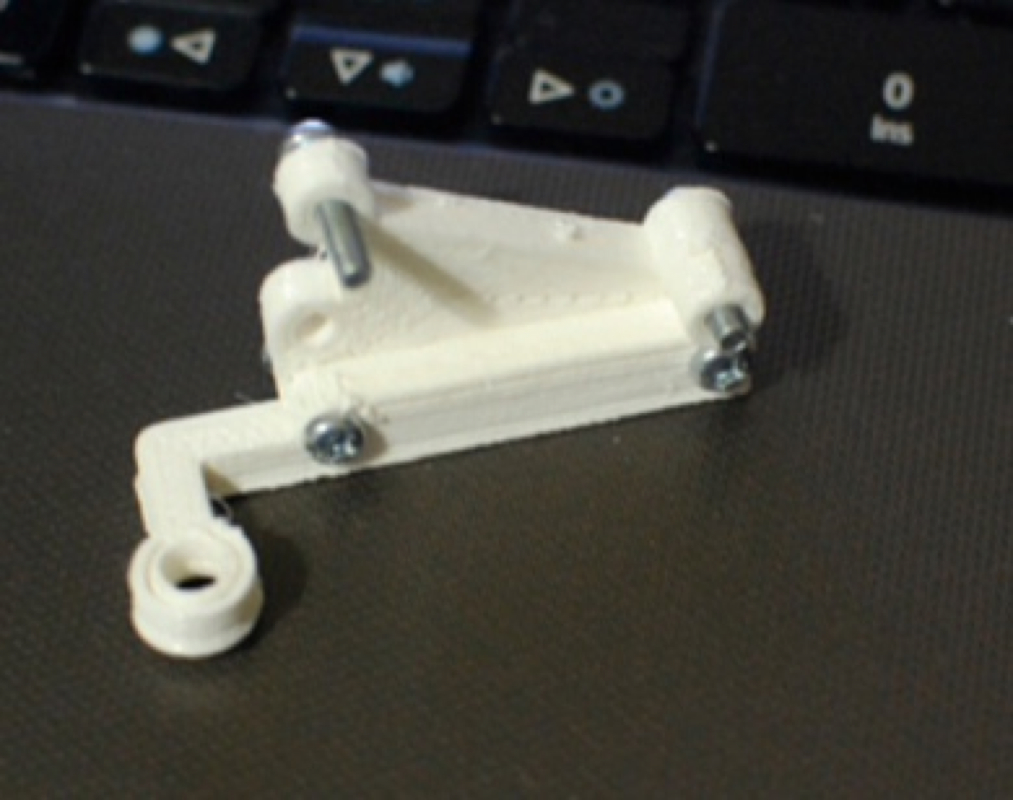
The next ops is to turn the chamfers on each side of the wheel so that it seats nicely in the slot of the aluminium extrusion.  The plan is to cut all the 18 pieces needed for the mini kossel and turn a shaft to hold them each at a time.  I've yet to think of how to turn the chamfers accurately for it to balance itself in the slot like the cross section pix below.
Picture
I'll figure that out when I feel better.  A little under the weather myself...

Be blessed!
0 Comments

Building the Mini Kossel

10/11/2013

0 Comments

 
I finally decided to ditch the Portabee, not being able to tweak it to print out the quality I want. I spoke to Terence about it and he shared that he has been doing his research on delta printers. After much deliberation, we settled on the Mini Kossel based on Terence's suggestion - he knows what he is talking about while I don't... lol...

This is how a Mini Kossel looks like (please click on the link to view the pix on Johann's Fllickr album as I've not gotten permission to post it here):  http://www.flickr.com/photos/jcrocholl/8730999022/.


From the description, he was using 15x15 aluminium extrusions for the structure.  Terence managed to find a source for the exact type but it seemed that the dealer in SG doesn't like to deal with personal purchases.  My email to them went into twilight zone...

I know a few places selling almost the same and so went checking.  The smallest I can find is the 20x20, which we bought 2 sets for our project.  The shop at King George's Avenue will only cut to shorter sections for ease of transporting the 5m length.  Good enough for us as we both own a horizontal bandsaw.
Picture
This was the first lot of 5m length of 20x20 aluminium extrusion cut into 4 short pieces for each of transportation.

Back home, while waiting for Terence to amend Johann's model to cater for the different size extrusion, I gave the Portabee another shot to see if I can print out something decent for use.  The result was not as bad as previous trials but I don't feel comfortable using the printed parts.  Here are some pix on the attempt:
Picture
Picture
Picture
Picture
If you wonder why is the part much shorter than the actual, I accidentally touched the USB cable connecting the printer to my notebook causing it to disconnect after an hour of printing... frankly, no point to finish the print from what I saw, and so the lost in communication was timely.

I received a good news from Terence just yesterday; he has completed the modification of the extrusion connectors and did a test print.  Result was good.  He went on to print some for me in blue.  I've just gotten back from his place with the parts.  They are so much nicer and the fit astonishing well!

Some pix to show off his work from his tweaked Replicator 2:
Picture
Picture
This is the same piece I was trying to print but created a mess out of...
Picture
I'm leaving this pix in its original size for greater details. See how well it fit the aluminimum extrusion? like a glove...
For our project, Terence will be the one doing the printed parts.  Mine will be turning the delrin wheels that ride on the slots of the aluminium extrusion.

More stuff to acquire the next few days.  We'll try to make whatever we can and buy the rest.  Once we have the basic Mini Kossel up and running, we'll be looking at modifying it.

That's all for now.  Be blessed!
0 Comments

Printing... Mess

17/10/2013

0 Comments


I know I'm supposed to continue with testing and calibrating the printer before playing with it. But I can't help but to try out printing more interesting but useful things. Allow me to indulge myself ok? Just for today...

After being able to print out the calibration cube with decent result, I was wondering if I can successfully print the adjustable endstop adjuster.

See for yourself what came out...

Picture
Started well.
Picture
Ended crappy...
Picture
Picture
Total mess...

On the positive, at least the gear like knobs are rounder than the first print. In fact, that's all the positive I get...

The next print I'd in mind is to replace the missing upper portion of the spool holder. This SHOULD be easier as everything is round. But...

Picture
Looks good?
Picture
Look again. Round?
Picture
It fits the bearing but the other end refused to go into the spool hole...

Let's try the filament guide.

Picture
This is how it should look
Picture
The first part
Picture
The guide
Picture
This was what I printed
Picture
Picture
Zooming in. To use this part, I'll have to do lots of cleaning up.

From the 2 sessions, I can conclude that the printer I have is far from being able to print anything useful. More work, more help needed...

0 Comments

3D Printer - Revisit

16/10/2013

1 Comment


It had been quite a long while I've posted anything. I've wanted to get back to the shop to do some work but many things demanded my attention.

A dear friend of mine, Terence, helped me recently to look at getting the Portabee working properly again. He did some tweaks, uploaded Marlin onto the board, and help calibrating it. The result he managed to get out of the DIY printer is commendable:

Picture
All printed on the Portabee. The mouse is rather cute...

The printer was sent back to me few days ago. As I was rather busy, playing with it started only late today.

Not wanting to disturb anything, I plunged into printing the adjustable endstop after keying in all the settings Terence sent. The first print was nothing short of a disaster, which I later realized that I missed out the retract checkbox... Can't even follow instruction... Lol.

Here are the ruins:

Picture
Oval shaped gears and a dilapidated structure...

With the retract enabled, I printed the 25mm calibration cube downloaded from Thingiverse as suggested by Terence.

The print came out alright though I prefer better resolution.

Here are the pix of the cube:

Picture
Picture
Picture
Picture
Picture
Picture
Picture

I measured the sides with my trusty Mitsutoyo Digital Caliper:

Picture
Picture
Picture

X and Y are a little oversized. Z is a little under. Terence suggested doing another print to confirm the result before any adjustments.

Oh, I forgot to mention; I lowered the print speed to 60mm/s when I saw the flow of plastic not catching up with the axes movements.

Test will resume another day. Full day of meeting tomorrow.

1 Comment

Z Axis Coupler - Second Attempt

26/8/2012

0 Comments

 
I planned last Saturday for a good long session in the shop today to make the stainless steel bushings for my dad and to make the couplers for the Portabee. As of yesterday late night, I know that it'll not come to pass when my mum called saying my grandmother has been warded. We were over at the hospital visiting her till past midnight, reaching home bashed.

This morning, I spent about half an hour in the shop to complete a piece of the coupler for the Portabee. As I ran out of aluminium of the right size, brass was used instead. Machining brass is such a joy and I went absolutely coolant free. Tapping the M6 and M3 presented no challenge at all. I don't know if it's the effect of the 2 new HSS taps I got from Mike or it is just the nature of brass. And, no additional effect is required to make brass look great.

This is how it looks installed:
Picture
I'll be machining 2 flats to aid in tightening the nut against it.
0 Comments

The Couplers Completed

26/8/2012

0 Comments

 
Got home late yesterday night and went straight to the shop to complete the job. The aim was to make another coupler for the other stepper motor and mill the flat for adjustable wrench. The 2 couplers turned out rather different; the flats were milled too deep for one.
Picture
Picture
Picture
Picture
Picture
Hope the difference will not have any impact on the overall performance of the Z axis.

Next up, the lead screw conversion for the Sherline CNC mill. Further upgrade to the Portabee will continue after this.
0 Comments

Mike showing off his new toy!!!

14/8/2012

0 Comments

 
Mike just brought in these:
Picture
He has been sending me pics of his printout... Quite a show off... But, the result from the Replicator looks so much better than the Portabee, likewise it's price... Will I? Will I not? Don't think, don't see, don't hear... Poison!!!
Picture
Picture
Picture
Picture
A closer look...
0 Comments

The Cross

24/6/2012

0 Comments

 
Picture
The print out is rather bad. The flow of molten PLA not consistent. Ruth rejected it and ask for a reprint.

While I was looking at it, a thought suddenly came upon me:

The cross is not a beauty, nor it is even at least pleasant. It is rejected by all, forsaken by God.

It is in that One Act; the act of love. An act so complete that made it so beautiful.

It is in that One Act that we can come boldly in the presence of our Father with no shame & guilt.

He died that we might live. He became poor for our provision. He was made sins so that we can have His righteousness.

This is my Jesus...
Picture
0 Comments

Printing Portabee Parts - X Carriage

24/6/2012

2 Comments

 
The print went well. Took about 50 minutes to print it out.

The problem with the print is, those parts that are supposed to be split (to act as clamps to the 3 LM6UU bearings) sticked together. Trying to cut them loose resulted in a broken piece... Too much force was used I guess.
Picture
Picture
I'll experient some more. The 2 girls are requesting for quite a few things to be printed. More time will be spent playing.

Waiting for the day to be able to get good results.
2 Comments

Owl Wire Wrap

20/6/2012

0 Comments

 
The fun thing with the 3D printer is the ability to just download STL models off websites, scale them down to fit the print area, and just hit the print button.  I find this particularly suitable for SG homes where space and time are usually the constraint.  It is very addictive and I often find myself looking at the machine putting on layers and layers of plastic to form the final shape.  Most of all, my girls love what it produces.

While surfing on Thingiverse looking at the model of those owls produced by its members, I came across this wire wrap for headphone in the shape of an owl.  It looks rather cute especially with the ear piece forming the eyes of the owl when the wire is wrapped around it.  Alicia, who took an interest in everything with owl printed from our recent Bangkok trip, immediately jumped in and told me that she would like to have one for her iPhone headphone.  The STL was downloaded and I printed 2 at one go.
Picture
It turned out that the STL for the headphone I downloaded isn't meant for iPhone's.  The 2 holes for the ear piece are too small to fit.

This forced me to do up the CAD from scratch following as closely as I can with the general shape of the STL from Thingiverse.  A few good hours was spent playing with Solidworks and BobCad to get the shape right.

Picture
And this is what I get after that few hours.  It works really well.  Due to it being a "fatter" owl, I'm not able to print 2 at one go.  My bed is too small.  So I spent another 30 mins printing one at a time.  Alicia, as usual, jumped in and took the first piece as her prize...

Picture
This is how it looks with the wire wrapped around.  Isn't it cute?!

Picture
Starting on 2nd piece for Ruth, I ran into some problem with the print.  Look at the left side of the job just below the eye.  I can't explain what happened with my little experience and knowledge.  So a reprint is in order as Ruth is still waiting though it was passed her bed time.

Picture
Just look at how proud she was when she finally got hers.

While having fun printing, I'm constantly thinking of how to improve the stability and accuracy of the printer.  I'm toying with the idea of changing out to better quality bears, using lead screws instead of thread rods for the z axis, etc etc etc.  I've some ideas in mind but don't know if they will work right.  Since this is just a hobby, I'll just give them a shot to see how they turn out.

Will keep you folks posted on the progress like usual.
0 Comments
<<Previous

    Enter your email address:

    Delivered by FeedBurner

    Categories

    All
    3d Printer
    Er32 Collet Chuck Proxxon
    Misc
    Misc Projects
    Projects
    Proxxon Pd400
    Sherline / A2Z Monster Mill
    Things I Bought
    Wabeco Mill

    Archives

    June 2018
    January 2017
    December 2016
    August 2015
    July 2015
    June 2014
    May 2014
    December 2013
    November 2013
    October 2013
    June 2013
    March 2013
    February 2013
    November 2012
    October 2012
    September 2012
    August 2012
    July 2012
    June 2012
    May 2012

    RSS Feed

Powered by Create your own unique website with customizable templates.