Wongster's Production
Share it on
  • Home
  • Blog
  • My Old Blog
  • My Shop
  • Resources
  • About Me...
  • Contact Wongster

ER32 Collet Chuck - Nose Job Part 1

6/5/2012

6 Comments

 
The ER32 collet chuck has always been on my want list for a long time. My search online came to a nought as none of those I found matches the Proxxon spindle flange. The spindle flange on the Proxxon has PCD of 83mm for the M6 mounting cap screws and requires recess of 70mm in diameter to mount accurately on its boss. I've 2 options available to me:
  1. Purchase one online and machine a suitable backplate to fit;
  2. Make one.

After reading several build logs and gotten lots of encouragement from the good folks of Metalworking Fun & Madmodder, I decided on option 2 - to make a Wongster's Production ER32 Collet Chuck.
Picture
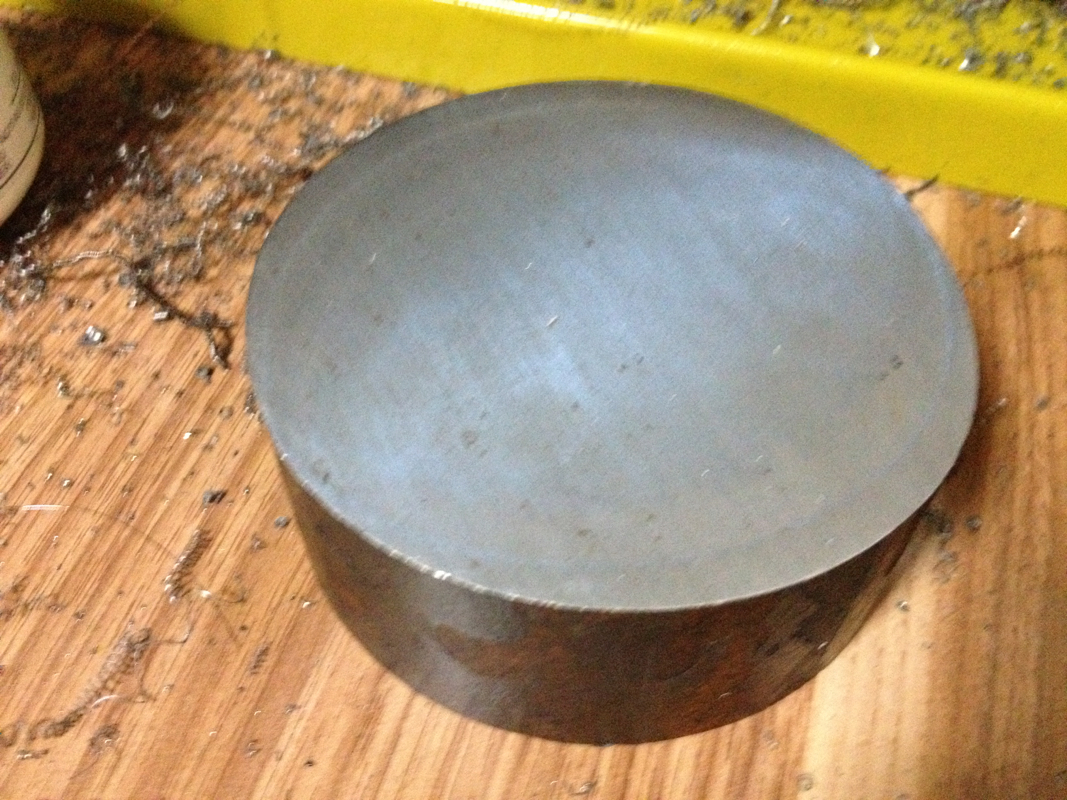
This is what I'll be starting with, a piece of mild steel stock slightly bigger than 100mm diameter and about 42mm in height. Wish I can find something around 55 to 60mm but this will do.
Picture
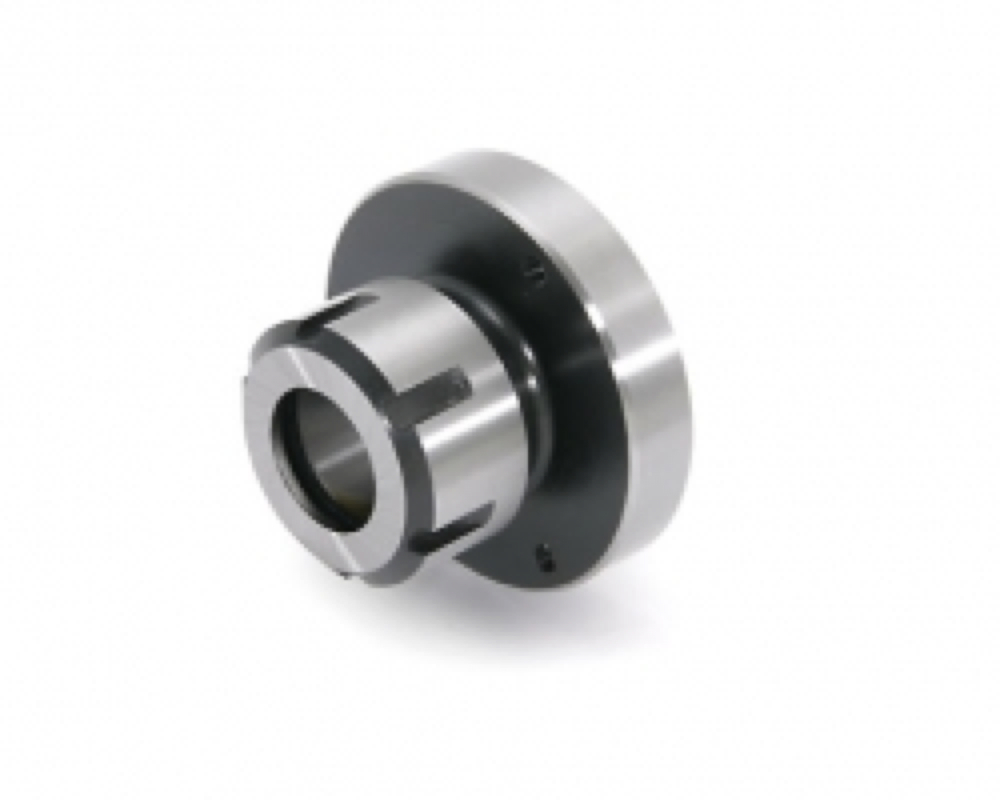
This is how it should ended up looking. The pic was taken from Axminster, for the SIEG C4.
Picture
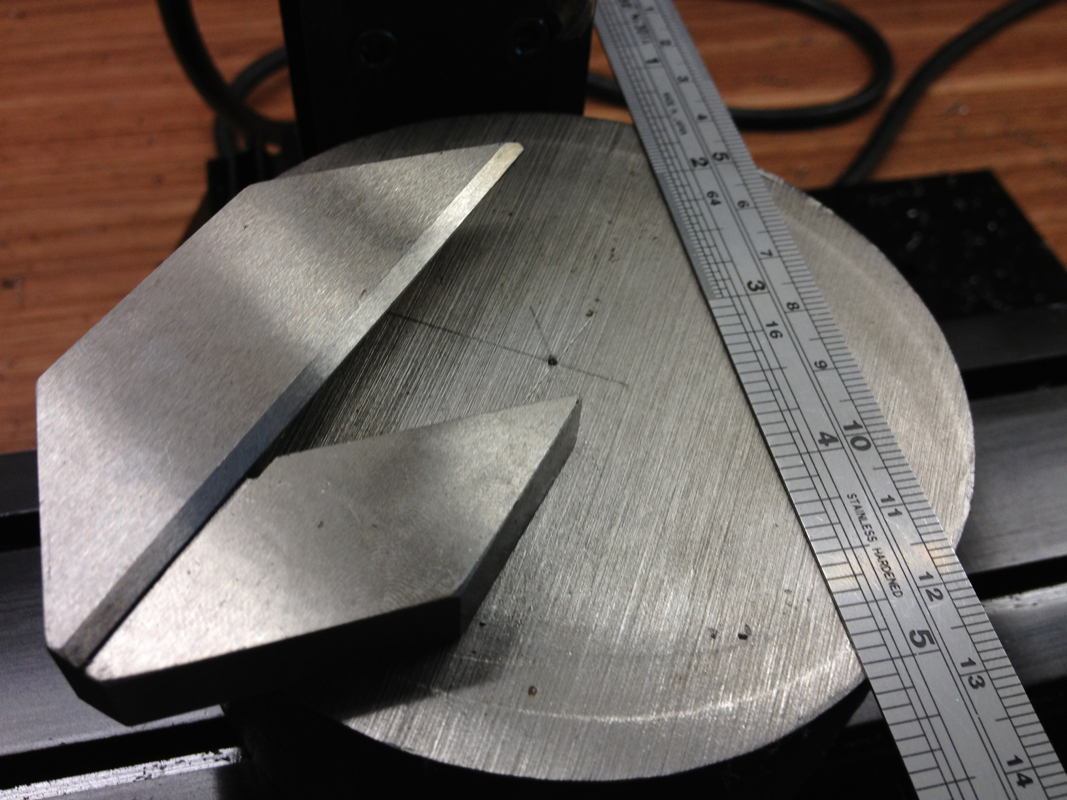
The newly acquired centre square in use to help locate the rough centre of the stock. It is a tad too short but I managed with the steel rule. 3 lines were drawn and the centre of the resulting triangle was punch marked to get the rough centre.
Picture
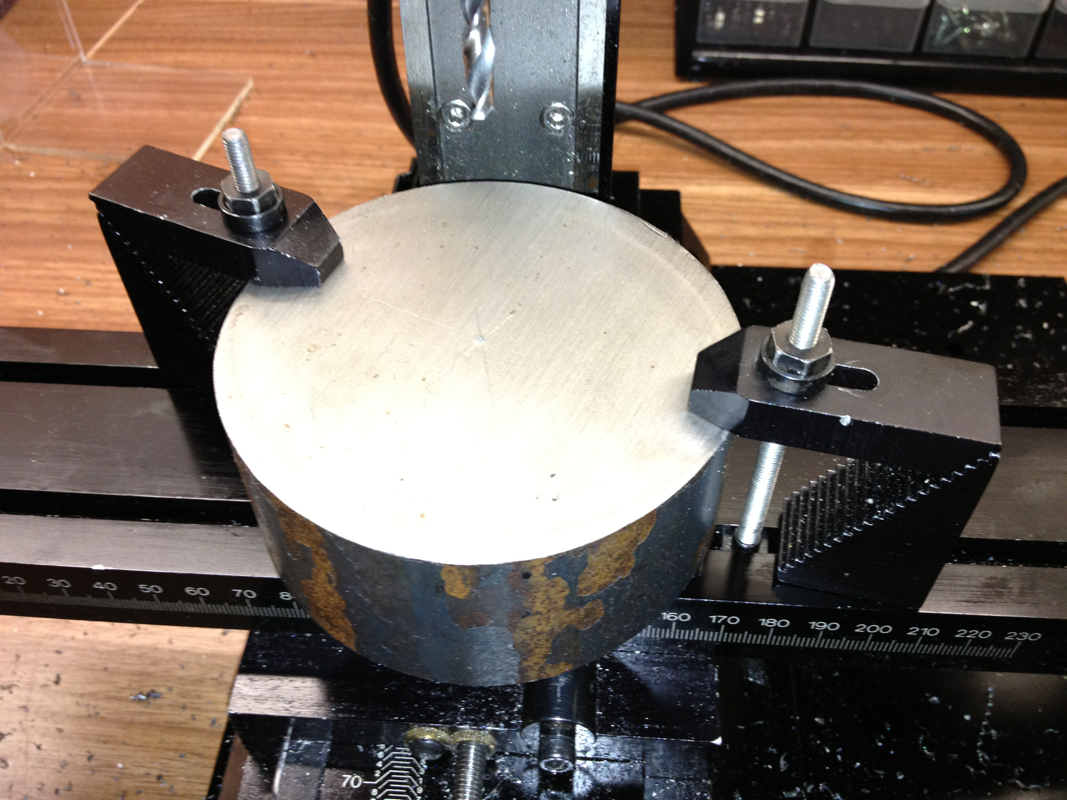
Stock fastened to the mill table with the Sherline's Step Clamps.
Picture
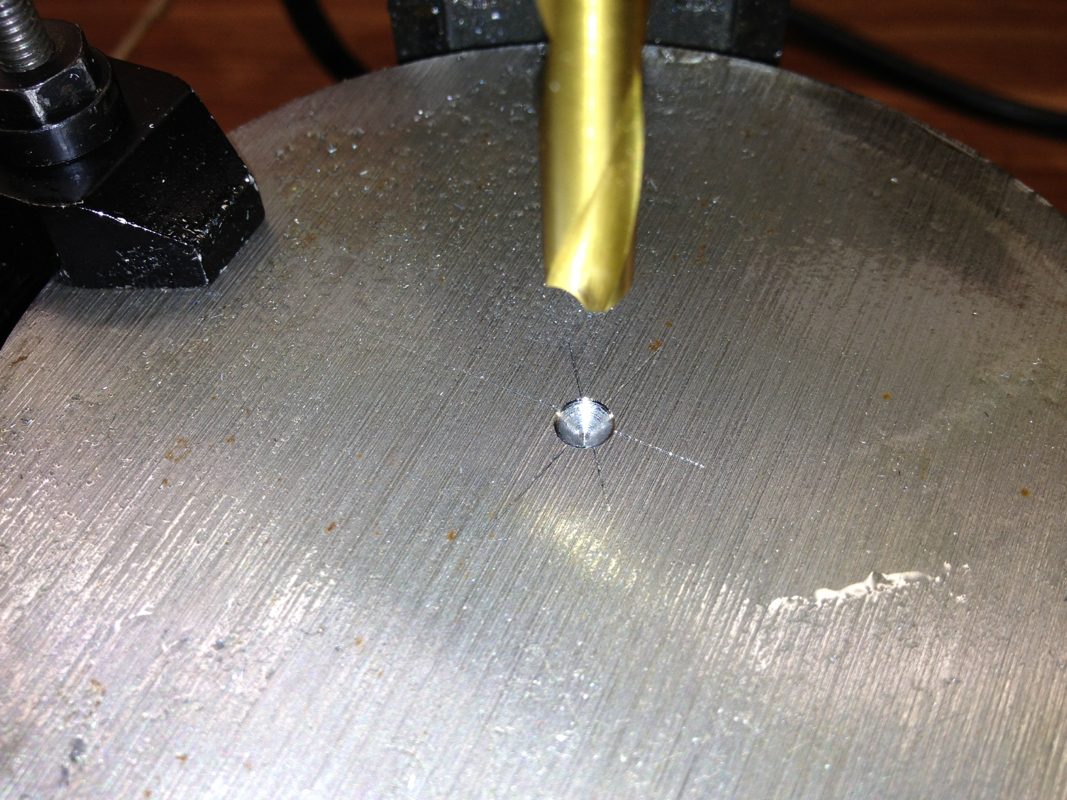
The 90-degree Spot Drill was used to make the centre. This proved to be a mistake. I should be using the Centre Drill instead to match the 60-degree point of the Live Centre.
Picture
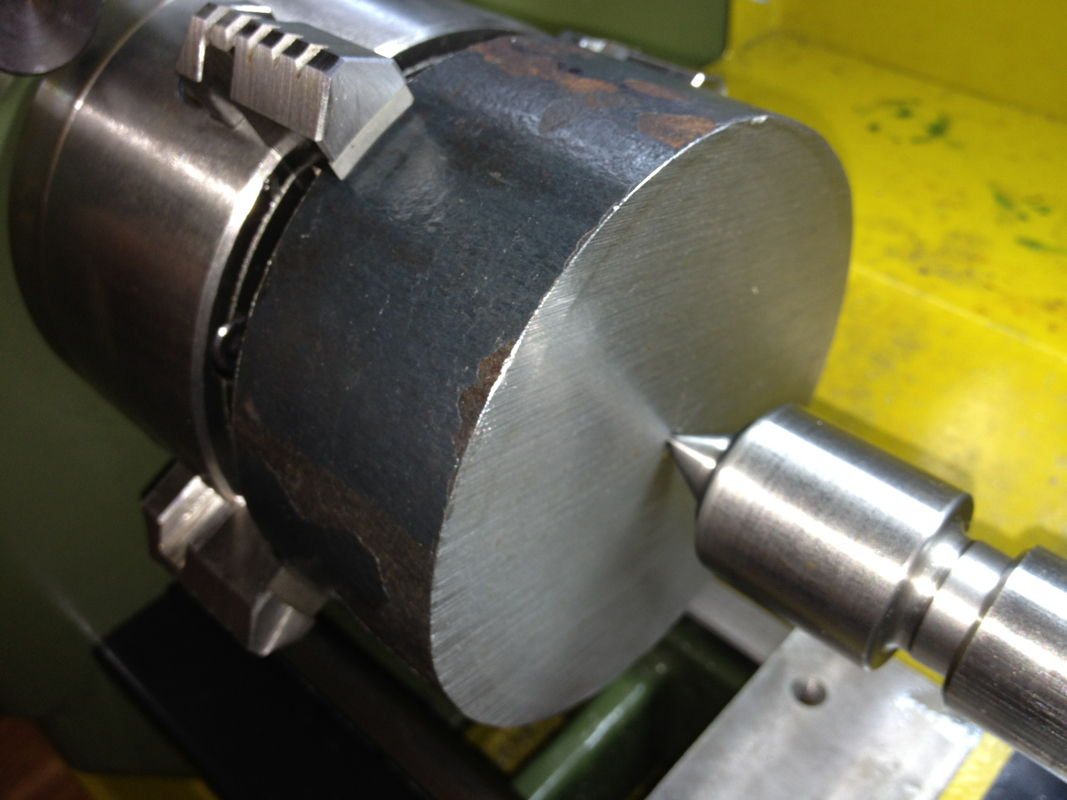
Using the Live Centre to hold the stock against the chuck face while I carefully tighten the 4 jaws of the independent chuck. The 90-degree hole make centring rather difficult.
I took a short video showing how "well" I centred the stock. The wobble was pretty obvious.
Picture
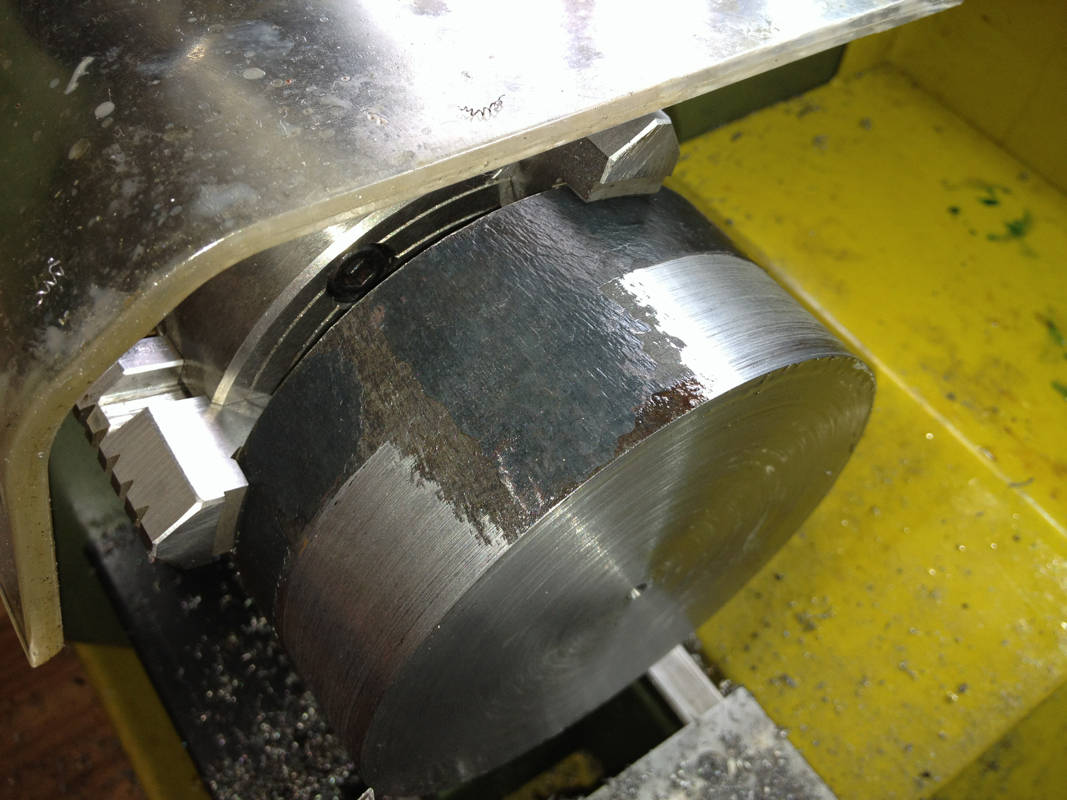
Turning down bit by bit. The "skin" was really hard...
Picture
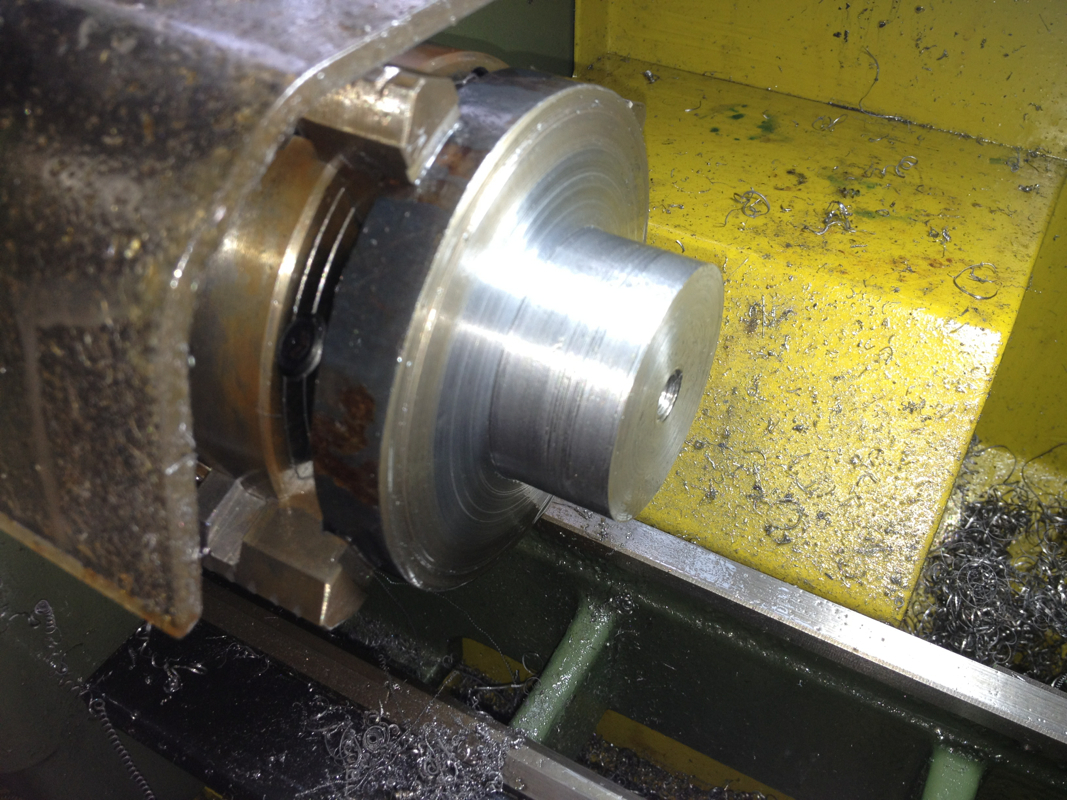
After several hours across several sessions, the section meant for the nose was reduced to 50.03mm. Lots of swarf was produced in the process. DaveH suggested that I reduced it further to 45mm and try to improve on the surface finish before flipping the stock over to work on the other side.

That's all I have for now. hope to get more done in my next session.
6 Comments
Gene King
9/5/2012 07:14:08 pm

Wong, I would approach this project a little differently. I would first square up the surface that mates to the lathe, machine all registration feature and drill the mounting holes and countersink them. Then I could mount the blank on the lathe registered as it will be used. This makes sure that the closing tape and threads are concentric with the spindle of the lathe.
Again i hope this makes sense.

GeneK

Reply
Wong
9/5/2012 10:37:51 pm

GeneK,
That was my initial plan. But the mounting of the chuck is from the front face and to do that, I've to have very deep counterbore holes to have the face and side exposured for further work.

The plan is to have cut the boss to rough size, flip it over to machine machine the registration, drill the M6 clearance holes, fastened it on the spindle flange, and square up the nose and front face before threading and boring.

Hope this would work out. Otherwise, I'll have to start over...

Regards,
Wong

Reply
Gene King
9/5/2012 11:35:50 pm

Wong, I wouldn't start over, I just wanted to express my thinking on this type of project. Also remember, I have access to shops with really big machines and tooling. Cy Swan was showing us his drill press drilling a 1 1/2 inch hole through a huge chunk of steel, I thought that the chips coming out of that hole were larger than the metal I start with for some projects!

GeneK

Reply
Wong
10/5/2012 12:55:25 am

GeneK,
I'll start over if this piece doesn't work out. Started with the stock too short anyway. From I've now, I feel that the mounting flange is a little on the thin side even before I started on the other side. I'll still go through the process to get a feel of things. Long process turnin down the nose... Many hours spent.

Regards,
Wong

Reply
Gene King
10/5/2012 03:54:33 am

Wong, that's the way to go, you may find other improvements along the way. I remember reading an article by Roger Smith, watchmaker in England. He started building a watch, and as he progressed the later parts had a much better finish than the earlier parts. So he remade the parts. He said he had made two or three watches while making one. Now he sells some for $30,000.00!
http://www.rwsmithwatches.com/

GeneK

Wong
10/5/2012 02:02:21 pm

GeneK,
Thanks for the encouragement. I guess that's the way I've to learn without anyone I can turn to locally. Thank God I've you folks to guide me along.

Regards,
Wong

Reply

Your comment will be posted after it is approved.


Leave a Reply.

    Enter your email address:

    Delivered by FeedBurner

    Categories

    All
    3d Printer
    Er32 Collet Chuck Proxxon
    Misc
    Misc Projects
    Projects
    Proxxon Pd400
    Sherline / A2Z Monster Mill
    Things I Bought
    Wabeco Mill

    Archives

    June 2018
    January 2017
    December 2016
    August 2015
    July 2015
    June 2014
    May 2014
    December 2013
    November 2013
    October 2013
    June 2013
    March 2013
    February 2013
    November 2012
    October 2012
    September 2012
    August 2012
    July 2012
    June 2012
    May 2012

    RSS Feed

Powered by Create your own unique website with customizable templates.