The iGaging Scales were purchased many months ago from Amazon.com. Five were bought, of which 3 are supposed to be for the Sherline 5410 and 2 for the Proxxon PD400. I never get to install them due to lack of courage in drilling and tapping holes on the machines. The scales were just collecting dust on the shelves...
Some recent discussions on the Metalworkingfun.com stirred up the desire to have DRO on my machines again. I was going through one of the recommended online seller, DROPros, and am interested in their Electronica Magnetic Scales. The scales, with the DRO, for 3 axis mill are priced from USD980 excluding shipping of USD140. That has not included GST charged for purchases above SGD400 when the items reached SG shore. Still concerned about not having the ability to drill and tap mounting holes on the machines, I decided to use the iGaging scales with remote DRO on each axis to test things out.
The Wabeco F1200 is a good candidate for this installation as (1) it is going to be the mill that I'll be using more often, (2) it came with M4 mounting holes which I can adapt for the installation with careful planning, and (3) there is a Youtube video by rjkflyer (you can watch it here) that shows his installation of digital scales on his F1200 using the existing holes.
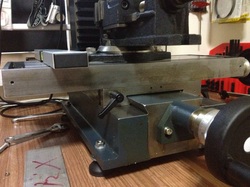
The X axis mounting holes can be seen clearly from this pic. This axis should be the easiest and I'll start off with it to boost my confident.
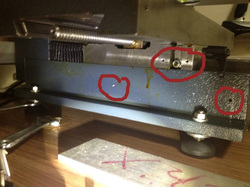
The Y axis mounting holes. I'm likely to fabricate a square bar of about 300mm long for the holes on the machine base. A bracket of sort will have to be made for the 2 holes on the saddle.
I observed from moving the table forward that the saddle mounting holes moved passed the front mounting hole on the base (the hole on the right of the pic). This means that I'll have to allow for the bar to protrude out to the front of the mill to cater for the reading head to be in the front position.
I observed from moving the table forward that the saddle mounting holes moved passed the front mounting hole on the base (the hole on the right of the pic). This means that I'll have to allow for the bar to protrude out to the front of the mill to cater for the reading head to be in the front position.
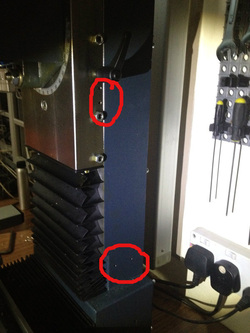
The Z axis hole locations. 2 provided at the base and 2 on the saddle. Need to think of how the bracket should look like.
Not many pics were taken during the process of mounting the scale for the X-axis. I spent most of the time measuring the distance between the reading head and the machine surface, the hole locations etc. A simple bracket made from aluminium was fabricated to mount the reading head to the saddle. The Wabeco mill is a joy to use. I've never been able to thin down a piece of thicker stock to the required thickness in such short time. The aluminium plate was rough cut on the bandsaw to about 50mm x 50mm and thin down to 49mm thick. 2 x 4mm holes were drilled for the hole on the saddle and 2 x 3mm for attaching the plate to the reading head. The counterbores for the 3mm holes are a little larger than necessary as I do not have a 5.5mm or even a 6mm endmill to use. So a 7mm was used instead.
I started off by trimming off the rough sawn ends. The Wabeco mill is a joy to use. The process was a quick one.
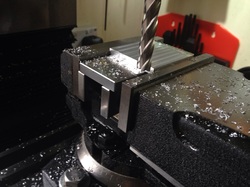
The 2 surfaces were faced next with a 10mm endmill. I have yet to receive the ER16 collet chuck with MT2 shank. So tooling at the moment is limited...
Again, the process was a quick one. I was simply gliding the cutter across the face of the workpiece...
Again, the process was a quick one. I was simply gliding the cutter across the face of the workpiece...
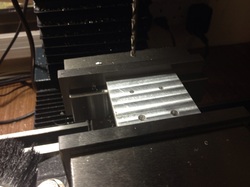
Mounting holes drilled; 2 x 3mm and 2 x 4mm clearance holes.
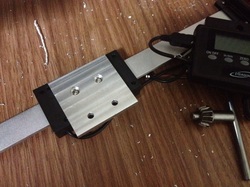
Fastening the reading head to the bracket. The counterbores are oversize.
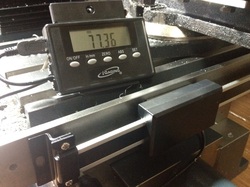
Installed on the mill. The scale in use is a little short of the mounting holes but the travel of the X axis is within the travel of the scale. Further, I realized that I do not have to cut up the longer piece I'm reserving for the Proxxon lathe as it works fine without this end shown in the pic screwed down.
I ran the axis from end to end to make sure that I do not run off the scale with the movement of the table. Also, I get back to zero every time I return the scale to the other end of the axis - a bonus for such low price scale.
I ran the axis from end to end to make sure that I do not run off the scale with the movement of the table. Also, I get back to zero every time I return the scale to the other end of the axis - a bonus for such low price scale.
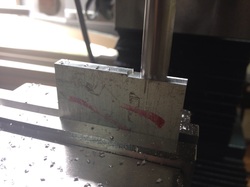
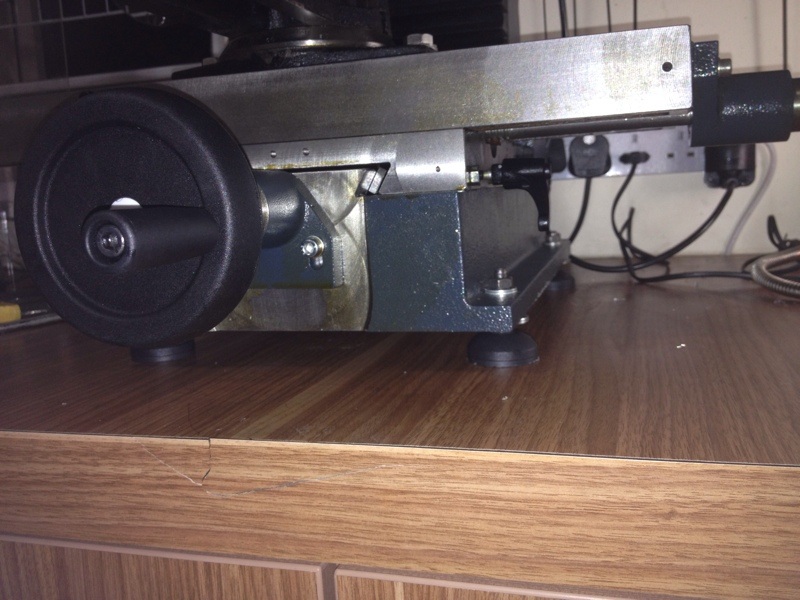
Before starting work on the scale, I installed the feet I bought. This activity is a rather strenuous one given the weight of the mill and me working alone. Tilting the mill and trying to free one hand to fit in the bolt took me quite a while. I later decided to slide the mill such that the mounting hole is off the bench for easy installation. I was so worried that the mill may fall off the bench when fixing up the feet for the holes at the back where most of the weight are behind. Sliding the mill around was much easier but that caused the Formica at the end of the bench to crack (see pic below).
I'll be continuing with the installation of the other 2 axes when I have decided on how best to mount the scales. Unlikely to be tonight - I'm too tired.
 RSS Feed
