It was in July this year that I installed the scale on X axis and that was many months after I purchased the sets of scales. I've been thinking about how to mount the scale on Z axis without drilling and tapping on any part of the mill. This is mainly due to my lack of confident in accomplishing what many think as an easy task.
I ran across a YouTube video posted by rjkflyer sometime ago and decided to roughly follow what he did to his Wabeco F1200 mill. His video can be found here: http://youtu.be/2z_xZFiNa14.
First order of the day is to find a way to mount the base of the scale. This one is simple, I merely make a piece of 5mm thick aluminium plate with 2 clearance holes for the M4 screws to mount the plate on and a M4 hole to hold the scale.
The simplest part to make.
The challenge I faced when finding a way to attached the reading head to the spindle saddle is the availability of suitable brackets. I contemplated buying a sheet metal bending brake to make my own but there are none available locally that is small enough for my already congested shop. Harbor Freight in US sells an 8" version which is what I need at USD199. But the shipping cost too much as the bending brake is rather heavy. In the end, I settle on fabricating my own from a piece of aluminium.
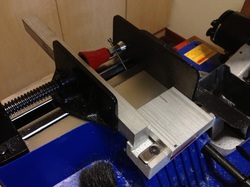
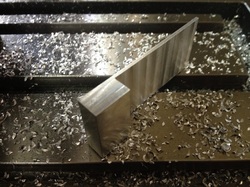
The closest aluminium plate I can find in my box is this 13mm piece. It is too small to clamp on the bandsaw to cut it to near required size. A long piece of square stock and the machinist jack help were employed to hold it properly during sawing.
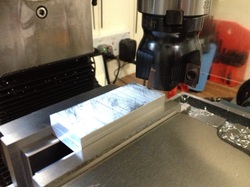
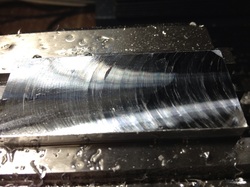
Facing the plate to required thickness of 10mm. I've been looking for opportunity to use the facemill. Since I've quite some meat to remove after clean up the first side, I put all all the 4 inserts to see if it works for me in this configuration.
Sad to say it didn't. The surface finish sucks! I tried different speed, feed, and used WD40 as lubrication. Nothing works. 1 piece of insert came off at a time and rather sad to say that I'm back to 1 insert on it.
The DOC tried were 0.1mm, 0.2mm, and 0.25mm. The mill has an MT2 spindle bore. If anyone has success in using this with all 4 inserts on , let me know please.
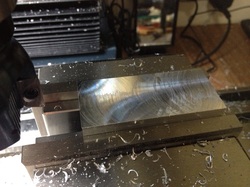
This is from using 3 inserts. The surface is not even.
This is from using 2 inserts. Almost the same as when I was using 3 inserts.
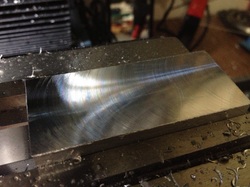
Back to 1 insert. Better. With WD40 and at faster speed, I achieved good finishes than what you see here.
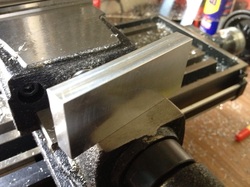
Took me a long time to get to the dimension I want.

Milling off the area that the reading head will be mounted on to. This is about 2mm thick, just before the last pass to bring it down to 1.5mm (so that I can reuse the M3 screws that came with the scales).
This was the scary moment. I was left with a couple of hair before hitting the vise jaws.
The basic shape done. Time for mounting holes.
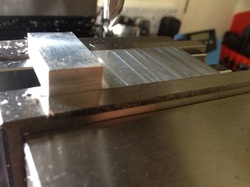
But before that, I did a dry fitting to also mark the mounting holes for the reading head (the black box with the wire sticking out of).
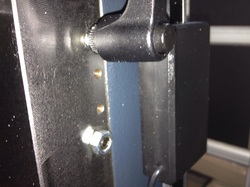
The 2 M4 holes from factory. Thanks to emcomachineTools.co.uk, I found all the mounting holes dimensions and distance.
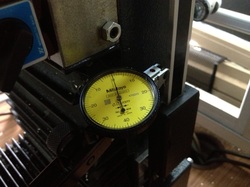
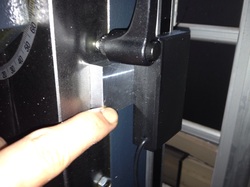
Running an indicator along the edge of the scale.
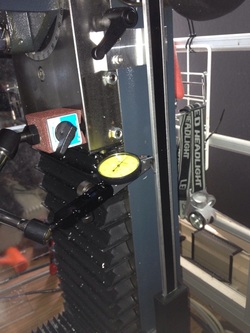
Took me a while to get it to within 0.02mm. The edge of the reading head was then marked on the bracket. The M4 holes on the underside of the reading head is 20mm away for its edge.
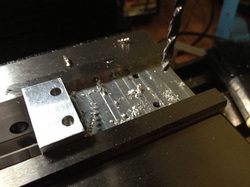
Drilling the mounting holes.
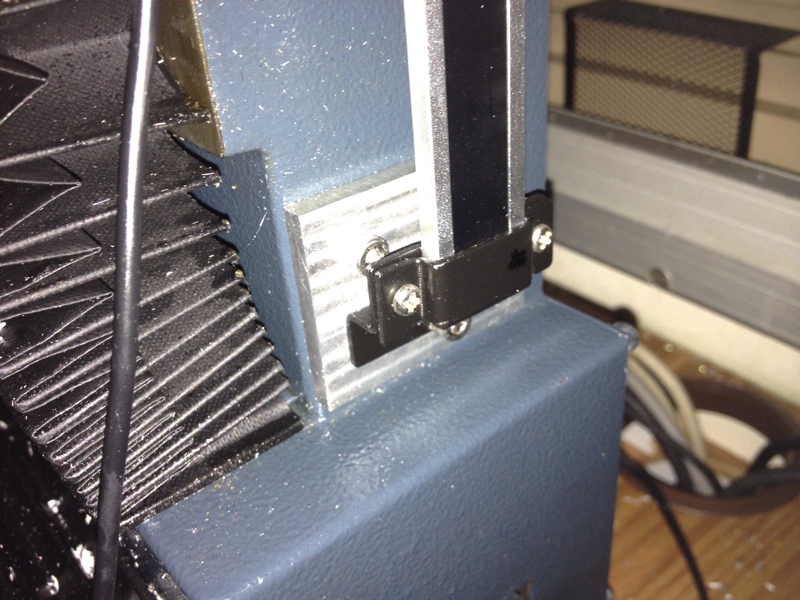
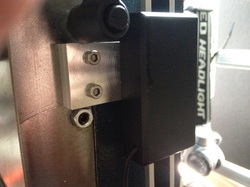
Perfect fit again!
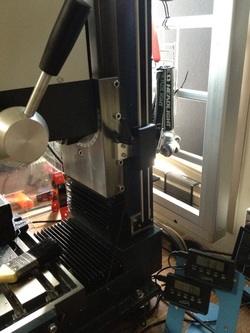
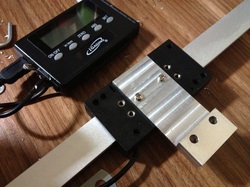
Done! It works beautifully! No binding along the entire length of travel.
Once I finished up with Y axis, I'll think of how I should mount the 3 DROs on the mill.
Once I finished up with Y axis, I'll think of how I should mount the 3 DROs on the mill.
At least something being accomplished today. Have not been productive in the shop for many months. I'll get on with Y axis after thinking through how I should mount it.
 RSS Feed
