It started with me checking out Graham's mod on installing the precision leadscrew on his Sherline that I ran across his other work in acrylics. He has a done tremendous work on illuminated acrylic plates with logos and lithophanes. I was so captivated by his work that I promised myself that I will give them a shot.
To see how a beautifully made lithophane looks like, visit www.ghqp.com.au and select Lithophanes from Photo Gallery.
To see how a beautifully made lithophane looks like, visit www.ghqp.com.au and select Lithophanes from Photo Gallery.
Ok. Now onto my version. I've this favorite photograph of my elder girl, Alicia, taken by her teacher when she was in Primary 1. I love the pic so much that I want this to be made into a Lithophane. It didn't turn out much like what was shown on Graham's site but hey, this is my first attempt. It can only get better with my next right? I sincerely hope so.
Enough of talking, onto the pics we go...
Enough of talking, onto the pics we go...
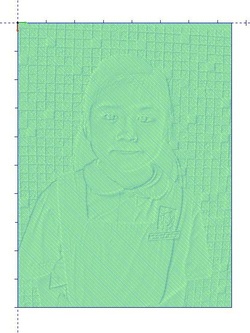
The pic was scaled to 75mm x 100mm as I do not want to spend too much time on setting up the workpiece on the mill.
After importing the pic into BobArt, the depth was set to max of 1.5mm leaving the resolution default. 2 sets of Slice Planar were selected, first with a 6mm ballnose and the second, 3mm ballnose. The 6mm was to take out as much material as possible, leaving the 3mm for the details.
For the 6mm ballnose endmill, the stepover was set as 1mm. For the finishing, I went with 0.5mm.
On hindsight, I should have go with a stepover value of 0.15mm for the smaller endmill, like what Graham did. This should bring out more details, though I'm not very sure if that's the problem. Maybe the picture size is a little too small... If you have the answer(s) for me, please leave a comment. Thank you.

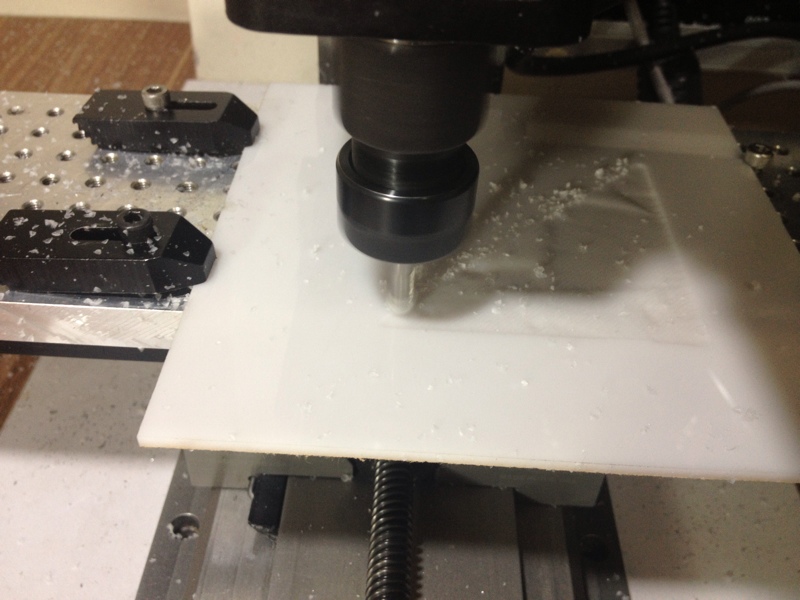
I've 3 pieces of this Opal coloured acrylic, courtesy of Terence. Thanks buddy! As I reached home rather late this evening, I didn't want to spend too much time thinking of how I should setup the work. From the pic, you can see the lazy man way. I did probe various spot of the workpiece using fingers; no popping or bending of the workpiece felt.
To zero the Z axis, I use the little 10-20-40 block I bought from Arc Euro Trade as the base for the tool to contact against. The block measures 10.7mm.
To zero the Z axis, I use the little 10-20-40 block I bought from Arc Euro Trade as the base for the tool to contact against. The block measures 10.7mm.
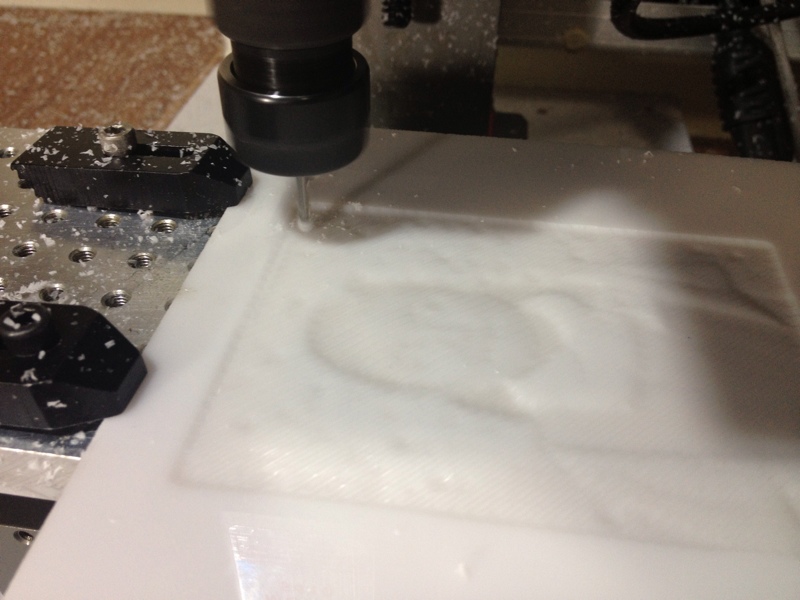
Some details showing.

Her face coming through...
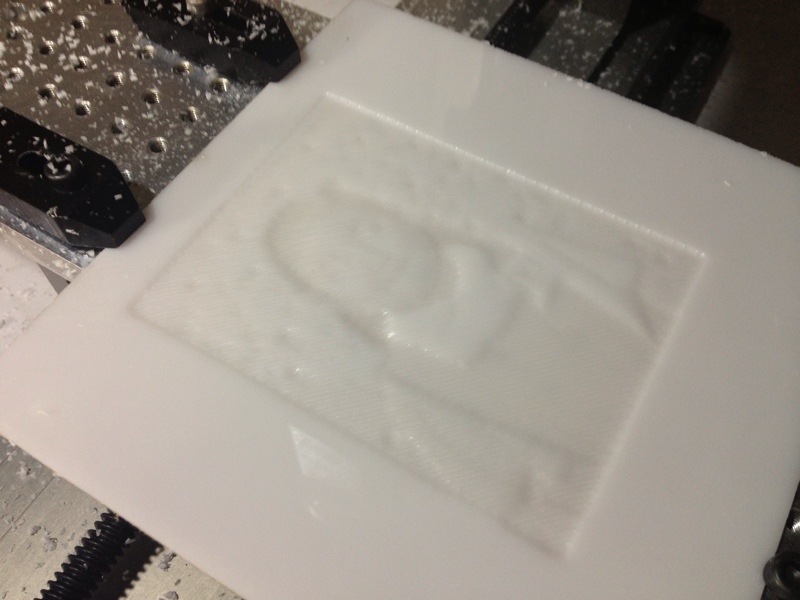
First pass done. Though there were ridges everywhere, I kinda like the effect...
More obvious looking from a distance. Look at the "snow" next to the mill! Messy...
Work continued after tool change. I almost screw up here. I forgot to touch off after tool change and hit the stop button instead of feed hold! After touching off, I tried resuming the job by clicking on Cycle Start. The spindle plunge straight down into the work! Thank God it was at the waste area that will be cut off later.
After bringing the spindle back to zero on all axes, I kept my fingers crossed while hitting the Run From Here button. Though reading so much of complain on this function, I encounter no problem with it.
After bringing the spindle back to zero on all axes, I kept my fingers crossed while hitting the Run From Here button. Though reading so much of complain on this function, I encounter no problem with it.

More details showing with the 3mm ballnose endmill.
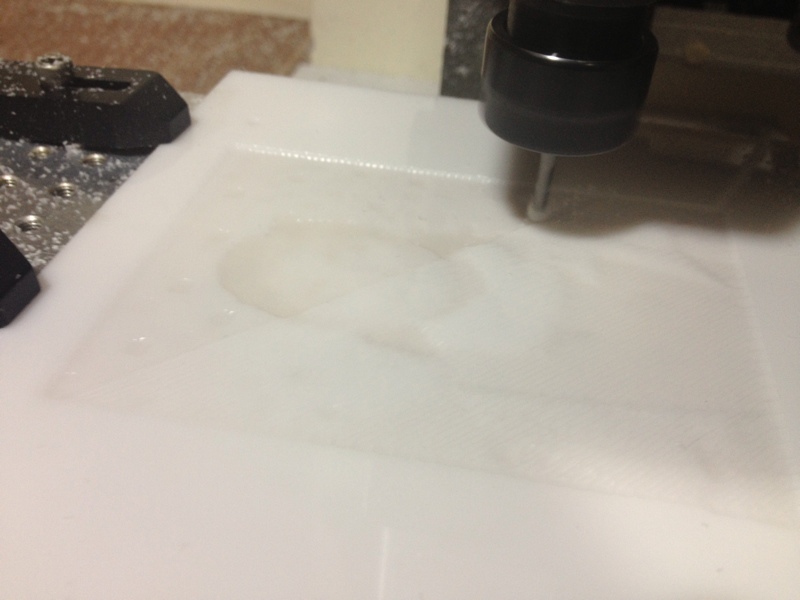
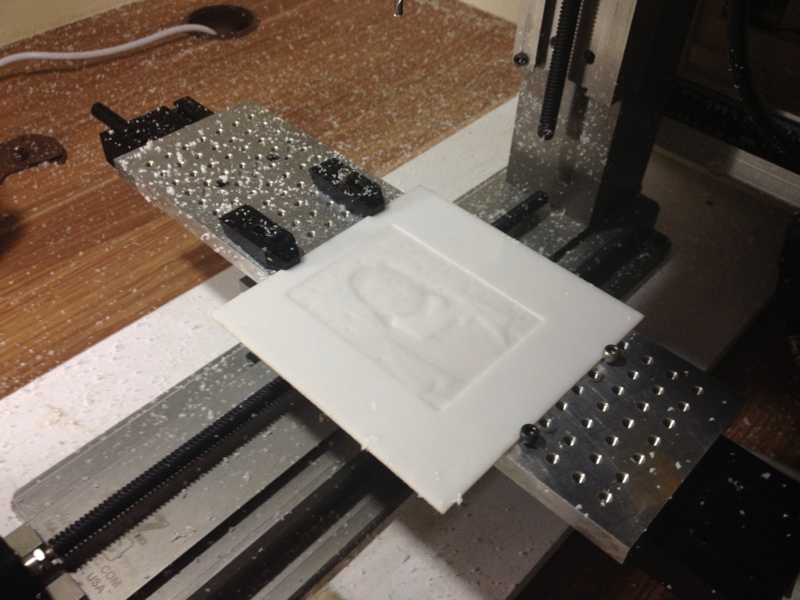
Starting to take shape.

Just look at how close I am to the end of Z axis. I'll have to work out a jig if this is going to be something I want to do for longer term.
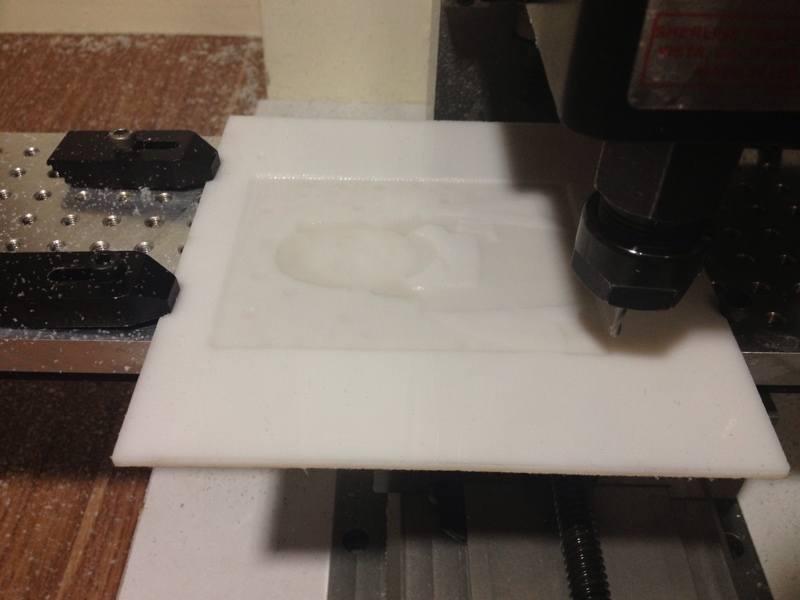
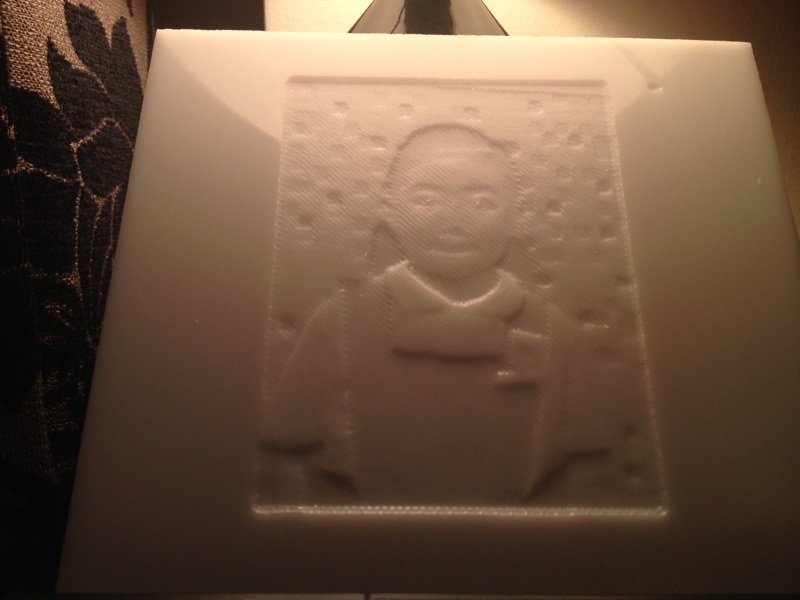
End of cut. The details on her face didn't come through very well. The mozzaic wall that I intentionally kept in the pic wasn't presented nicely too. Sigh... Need more information on how to do a proper Litho. Anyone can lend me a helping hand?
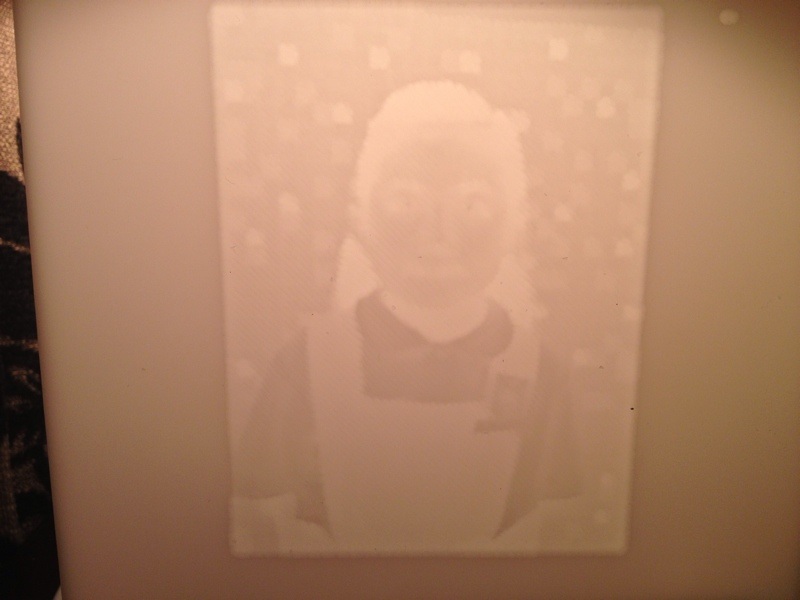
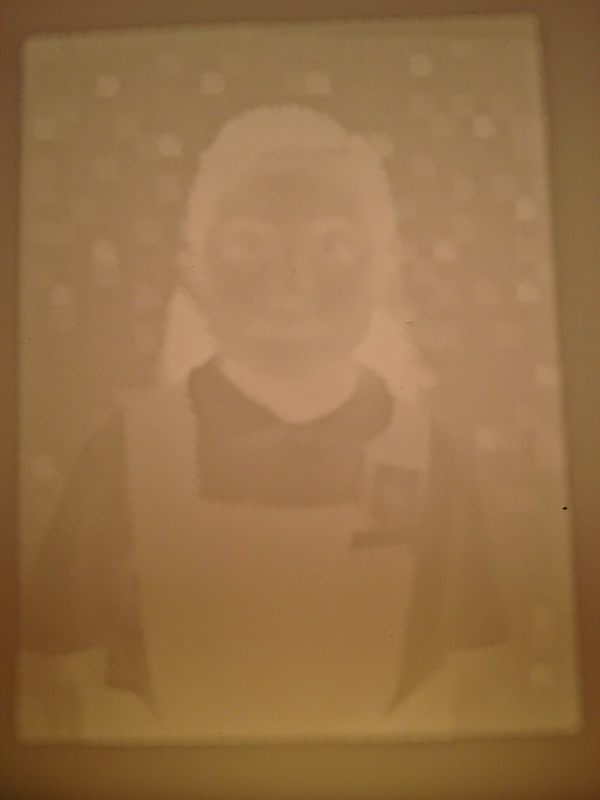
With my first Litho done, I tried placing it against light source to see if I can have it miraculously appear as those I saw on Graham's website. Said to say nothing close... Being known to have thick skin, I'll still show them here for your comments or criticism.
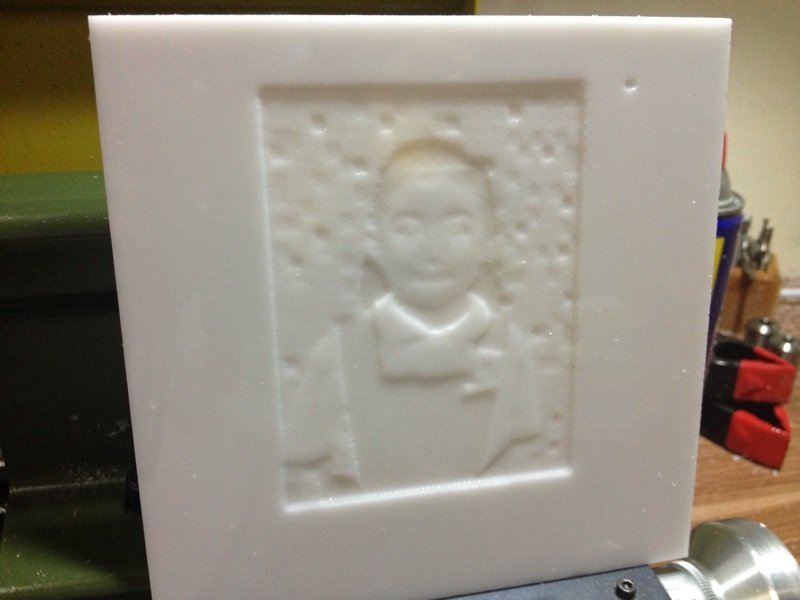
Light from front. You can see the little hole on the right. That is from the silly mistake I made during tool change.
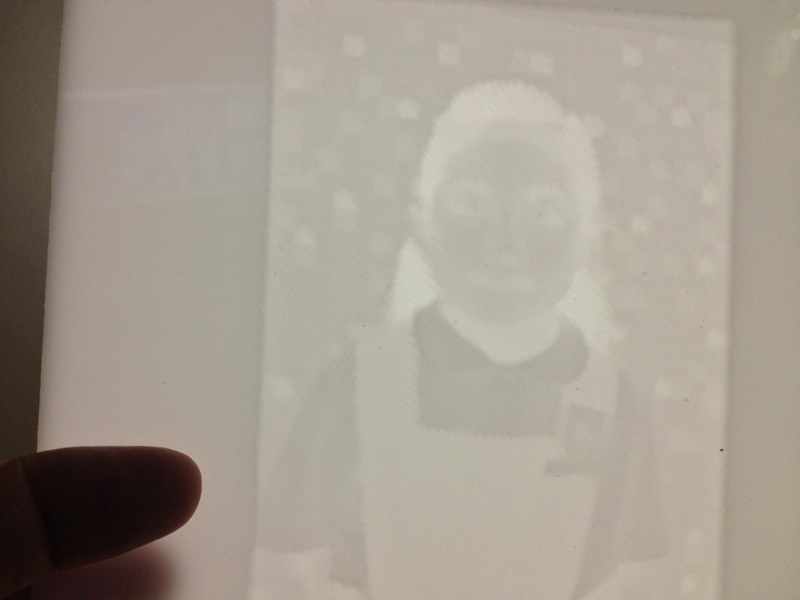
White light from the back. Eeeewwww.....
From top front using the bedside lamp.
Medium intensity from the bedside lamp.
Low setting from the bedside lamp.

Can't recall what I tried. But it seemed to be the best so far.
From the use of different light source and intensity, I found that the brighter the light source, the more obvious the mistake(s) made on the Litho.
To bring out more details and get rid of the cut lines, I'll be experimenting with different depth, sizes of ballnose end mill, and stepovers. If there is anyone reading this with experience in making Litho, I would love to hear from you. You'll likely help me "stepover" all the pain in testing with different settings. This piece took me almost 2 hours to complete. This is excluding time taken in generating the toolpaths, setting up etc.
The Sherline spindle runs at max of 2800 rpm. If this is too slow, I've the 10k pulley set that I can install. Also, I've the Proxxon IB/E spindle that I can put on the mill for up to 30k rpm cut, but that will have to wait till I fabricate the mount to adapt it to the mill.
Ok, hitting midnight soon. I've to get up early tomorrow to prepare for church. Till the next session, be blessed!
 RSS Feed
