Took a day off after sending Alicia to the airport for her CCA trip to Bandung, Indonesia. Going to miss this big baby of mine.
After having a good sleep, I started working on the aluminium extrusions. From the wiki, I need 9 x 240mm and 3 x 600mm for the frame. I thought through the process of getting them to equal length. Once I decided on the approach, I went to work.
After having a good sleep, I started working on the aluminium extrusions. From the wiki, I need 9 x 240mm and 3 x 600mm for the frame. I thought through the process of getting them to equal length. Once I decided on the approach, I went to work.
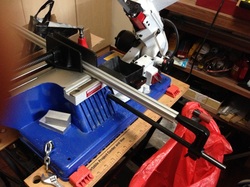
For the 240mm length, the endstop on the bandsaw was used, after marking out the first piece.
I just love this machine; it cuts through aluminium like butter without much of a mess. The Proxxon chop saw I have is too messy and noisy to be of use in my humble flat.
I just love this machine; it cuts through aluminium like butter without much of a mess. The Proxxon chop saw I have is too messy and noisy to be of use in my humble flat.

In no time, I've the 9 pieces done with some left over from the 2 x 125mm I started wiith. I've still the other 2 pieces of the 125mm left for the 3 x 600mm pieces.
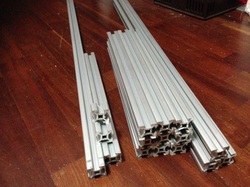
All required length rough cut. The left overs are on the left of the pix.
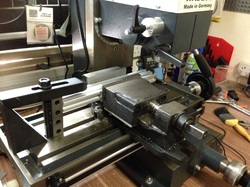
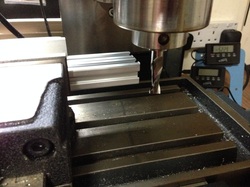
Using a 20x40x80 block and clamp, I started milling off the first edge 2 pieces at a time.
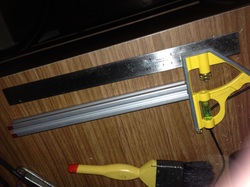
Using the combination square, the required length of 240mm was marked out with a scriber. I'm not looking at accuracy for the extrusions, just need them to be of the same length, plus minor a little.
The parts were then flipped over. Several rough cuts were made and when I'm getting close, I crept up to the marked line. Once there, I measured the length again with the measuring tape (my mitutoyo caliper can only measure up to about 150mm) for confirmation. The DRO was then zeroed.

All 9 pieces done.
The iGaging DROs are of great help here. Considerable care was taken for the first set. Once the reference point can be established with the DRO, the rest were easy - merely cutting to zero.
The iGaging DROs are of great help here. Considerable care was taken for the first set. Once the reference point can be established with the DRO, the rest were easy - merely cutting to zero.
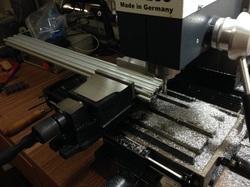
I'm unable to use the same approach on the 600mm length, of which 3 are needed for the vertical of the frame. So I lined them up as close as possible and as flat as possible to the bottom of the vise and milled off the first side. A clamp was then used to hold the 3 pieces together.
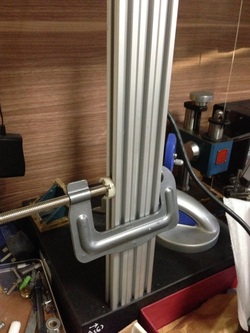
Though not necessary, I still check the setup on the surface plate. they're at the edge because of the overhang at the top of my bench where the surface plate sits.
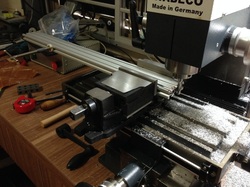
The other side was then milled, leaving a little short of the final 600mm length. Call me paranoid, I want another clamp to be put on and flip the part over to clean up the other end again.

Now both sides done and the 3 extrusions to length.
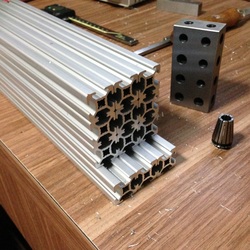
stacking them up for photo shoot. I know I shouldn't be leaving the ER16 collet around like this. Forgotten to keep it in the box.
The pattern formed by the extrusions looks nice...
The pattern formed by the extrusions looks nice...
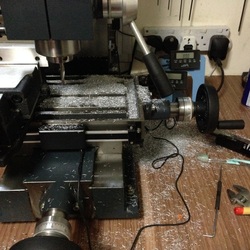
It seemed that it wasn't very messy from the pix but I've chips everywhere...
I'm rather pleased with the result I get from the few hours I spent today in the shop. Terence will be sending over the balance 2 pieces of the connecting pieces. The frame should be up by then.
He will also be bringing over a short section of delrin rod. I'll be making the wheels for the carriage to ride between the slots of the extrusions. 2 x flange bearings will be press in to the wheels. There are a total of 15 wheels to make: 3 sets of 3 for the 3 carriages and 3 sets of 2 for the idlers where the belts will ride on.
From the sketch he drew, this should be a simple lathe job. Looking forward to start working on it.
Back to my day job tomorrow. Hope to have some time next few days to do some work in the shop.
Be Greatly Blessed!
 RSS Feed
